Join the Fediverse: installing Mastodon 4.0 on Ubuntu 22.04 with Docker Compose


In the past week or two, with Elon Musk completing his purchase and take-over of Twitter, there has been a torrent of defections from the centralised, closed, for-profit platform to its antithesis, the Fediverse - it's a portmanteau of "federation" and "universe". The Fediverse, in short, is a set of Free and Open Source Software (FOSS) applications created by different quite independent communities of developers, sharing one thing in common: the (somewhat magical) ActivityPub open standard for data characterisation and exchange. They are deployed independently by interested individuals and communities to form a 'decentralised network' of ActivityPub-enabled services (here's a quick explanation video). Of these many applications (with new ones popping up every day!), probably the most ambitious and widely known is Mastodon (which also features a short video explanation).
For those not (yet) familiar with it, Mastodon is a 'micro-blogging' platform superficially somewhat similar to Twitter, but different in many important details. It is also a collection of FOSS applications, notably an 'instance', aka a server (the subject of this how-to), and a variety of 'clients' that support people interacting with one or more instances. A user installs a client on their phone or desktop, or simply uses a web browser, opening the instance's web address (URL) in a tab. Either the tab or the client becomes their portal for engaging with the Mastodon instance and the various ActivityPub streams the user selects to see via that instance. That selection is done via 'following' other users on the same or different instances, whether those instances are also Mastodon or one of the other Fediverse applications (here's a fairly complete list). Users can further 'shape' their feeds by employing filters selecting or eliminating those containing specific 'hashtags' (a hashtag is just a word - or CamelCaseCollectionOfWords - in a post or 'toot' that has a '#' hash symbol at the front of it) and/or by blocking/muting specific other Fediverse participants whose contributions they prefer to avoid.
We, here at the OER Foundation, have been running Mastodon for 6 years now, but the sudden spike in interest and changes to the various dependent technologies since our previous Mastodon howto have motivated me to create this streamlined, updated version. We're very keen to see lots of individual academic institutions running Mastodon instances on behalf of their learners and broader educational communities! The cost is fairly trivial (USD30-50/month) for an instance with a thousand or two users, especially for an institution.
Tips for this tutorial
This tutorial is aimed at adventuresome would-be system administrators. I endeavour not to assume any specialised knowledge on your part, and try to provide useful tips and exposition along the way to help you build a valid mental model of what you're doing. At the same, this is not a trivial process. Luckily, if you try it out, and decide not to follow through, so long as you delete your VPS, you should not be out-of-pocket by more than a few cents.
If this is your first attempt at 'self-hosting', and you do follow through, this could be the start of a new era in your technical status - you could realised that 'agency' you always wanted. Plus, I'll be very impressed by your esprit de corps and tenancity!
With this tutorial, I'm assuming you've got a computer with an Internet connection, that can run SSH (all modern systems should do that) and you can copy-and-paste stuff from this tutorial (in your browser) into either a terminal window (in which you're SSH'd into your VPS) or into a text editor. Note, if you find it difficult to paste into a terminal window, try using CTRL+SHIFT+V (CTRL+V is already used as a short-cut for something else in UNIX terminals since long before the Windows world started using CTRL+C and CTRL+V).
When I provide files you need to copy, look for the placeholders with values you need to substitute (search-and-replace) in square brackets - [] - with your own values. I assume you'll be able to do that in a text editor on your desktop.
Create a Virtual Private Server
The first step is to create a place to host the Mastodon instance. You can run it on a local piece of hardware of sufficient capacity, but make sure you've got a fast and symmetrical (as fast to upload as to download!) connection. If (as with most residential Internet services) your upload is much slower than your download (often 1:10 ratio) your server is going to be very slow for external people, especially if streaming video. Also, don't undertake this unless you have a flat-rate data connection.
The more cost-effective approach in our experience, is to secure a low cost commodity Linux Virtual Private Server running Ubuntu Linux 22.04 (the latest "Long Term Support" version). That's what we'll assume you're running for this tutorial. We have used quite a few Linux VPSs commodity providers. Known good options are Digital Ocean (who recently raised their prices significantly), Linode, Vultr, Hetzner, and TurnkeyLinux. There are many (hundreds) of other credible options. We recommend you find one hosted in the network epicentre (which isn't necessarily the same as the 'geographic' epicentre) of your audience.
If you have trouble getting a VPS, you might find this video I created for provisioning a VPS, using Digital Ocean as an example. In my experience, the process for provisioning VPSs on other platforms is very similar. You'll find this process much easier than using either Microsoft Azure or Amazon AWS, which we do not recommend. Their systems are unnecessarily complex, proprietary (they will lock you in), and about 10 times more expensive than commodity hosting options.
VPS Properties:
We recommend that, for a Mastodon instance of modest size (say up to a few hundred active users) you provision a VPS with the following spec (go as high as you can afford to). You should be able to upgrade those specs in realtime if required, except for your disk space. You can, however, provision a secondary storage space (you can start small and increase it as you need to). I will cover setting this up, as it'll make your life far far easier in the medium-long term.
- 8-16 GB RAM (a small instance can be run on 4GB RAM, so you could start with that, as RAM can be upgraded easily)
- 2-4 Virtual CPUs
- 80-160 GB Disk space (NVME disk is faster than SSD which is faster than spinning disk space)
- running Ubuntu Linux 22.04 (the current Long Term Support version)
- extra storage - 20-40GB extra space (can be expanded on fairly short notice)
You'll need to create an account for yourself on your chosen hosting provider (it's a good idea to use Two Factor Authentication, aka 2FA, on your hosting account so that no one can log in as you and, say, delete your server unexpectedly - you'll find instructions on how to set up 2FA on your hosting provider's site) and create an Ubuntu @2.04 (or the most recent 'Long Term Support' (LTS) version) - 24.04 is likely to come out in April 2024) in the 'zone' nearest to you (or your primary audience, if that's different).
If you don't already have an SSH key on your computer, I encourage you to create one and specify the public key in the process of creating your server - specifying the 'public key' of your SSH identity during the server creation process that should allow you to log in without needing a password!
You'll need to note the server's IPv4 address (it'll be a series of 4 numbers, 0-254, separated by full stops, e.g. 103.99.72.244), and you should also be aware that your server will have a newer IPv6 address, which will be a set of 8 four hex character values (each hex character can have one of 16 values: 0-9,A-F) separated by colons, e.g. 2604:A880:0002:00D0:0000:0000:20DE:9001. With one or the other of those IPs, you should be able to log into your new server via SSH. If you're on a UNIX command line (e.g. a Linux or MacOS desktop), do this in a terminal. On Windows, I understand people use a tool called Putty for SSH, in which case follow the app's instructions.
ssh [your server IPv4 or IPv6]
followed by the ENTER key (that'll be true for any line of commands I provide).
In some cases, depending on your hosting provider, you'll have a password to enter, or if you've specified your pre-existing public SSH key, you shouldn't need to enter a password at all, you should be logged in. To check what user you care, you can type
whoami
If it returns root (there's also a convention of using a '#' as the command prompt), you're the root or super-admin of the server. If not, you're a normal user (some hosting providers have a convention of giving you a default user of "ubuntu" user perhaps "debian") with a prompt that is, by convention a '$'.
Now that you're logged in, it's worth doing an upgrade of your server's Ubuntu system! Do that as follows:
sudo apt-get update && sudo apt-get dist-upgrade
Usually the user, even if it's not the root user, will have the ability to use the sudo command modifier - that means "do this action as the root (aka the 'Super User', thus 'su' for short) user" - you may be asked to enter your password as a security precaution the first time you run a command prefaced by sudo. Enter it, and it should run the command. Plus, the system shouldn't bother you for it again unless you leave your terminal unused for a while and come back to it.
At this point, I also like to install some cool software called 'etckeeper' which records configuration changes on your VPS for future reference (and recovering from administrative mess-ups):
sudo apt-get install etckeeper
which will also install some dependencies, including the very important (and relevant later on) 'git' version control system.
Key variables for you Mastodon
To set up you Mastodon, you'll need a few crucial bits of information related to your system's identity and external systems you'll need it to interact with. For example, as mentioned before, you'll need a domain name. For the rest of this tutorial, we'll use the convention of representing those variables as a name inside [], or, for the domain name you've picked, [domain name].
Here's a list of variables you'll need to know to complete the rest of this tutorial:
- [ipv4] and [ipv6] - your VPS' IPv4 and IPv6 addresses (the latter can be ignored if your cloud provider doesn't support IPv6 addresses) as described above.
- [domain name] - the fully qualified domain name or subdomain by which you want your instance to be accessed. You must have full domain management ability on this domain. Example: mastodon.oeru.org - that's the mastodon subdomain of the oeru.org domain. Authenticating SMTP details - this is required so your web service can send emails to users - crucial things like email address validation and password recovery emails...
- [smtp server] - the domain name or IPv4 or IPv6 address of an SMTP server
- [smtp port] - the port number on the server that is listening for your connection. By convention it's likely to be 465 or 587, or possibly 25.
- [smtp reply-to-email] - a monitored email to which people can send email related to this WordPress site, e.g. notifications@[domain name]
- [smtp user] - the username (often an email address) used to authenticate against your SMTP server, provided by your email provider.
- [smtp password] - the accompanying password, provided by your email provider.
- [your email] - an email address to which system-related emails can be sent to you, perhaps something like webmaster@[domain name].
- [vps username] - the username you use on your server (by convention, these are one word, and all lower case).
Get your Domain lined up
You will want to have a domain to point at your server, so you don't have to remember the IP number. There're are thousands of domain "registrars" in the world who'll help you do that... You just need to "register" a name, and you pay yearly fee (usually between USD10-30 depending on the country and the "TLD" (Top Level Domain. There're national ones like .nz, .au, .uk, .tv, .sa, .za, etc., or international domains (mostly associated with the US) like .com, .org, .net, and a myriad of others. Countries decide on how much their domains wholesale for and registrars add a margin for the registration service).
Here in NZ, I use the services of Metaname (they're local to me in Christchurch, and I know them personally and trust their technical capabilities). If you're not sure who to use, ask your friends. Someone's bound to have recommendations (either positive or negative, in which case you'll know who to avoid).
Once you have selected and registered your domain, you can 'manage your Zone' to set up (usually through a web interface provided by the registrar) an A Record which associates your website's name to the IPv4 address of your server. So you should just be able to enter your server's IPv4 address, the domain name (or sub-domain) you want to use for the web service you want to set up.
Nowadays, if your Domain Name host offers it (some don't, meaning you might be better off with a different one), it's also important to define an IPv6 record, which is called an AAAA Record... you put in your IPv6 address instead of your IPv4 one.
You might be asked to set a "Time-to-live" (which has to do with the length of time Domain Name Servers are asked to "cache" the association that the A Record specifies) in which case you can put in 3600 seconds or an hour depending on the time units your registrar's interface requests... but in most cases that'll be set to a default of an hour automatically.
Set up an unprivileged user for yourself
You should be able to test that your A and AAAA Records have been set correctly by logging into your server via SSH using your domain name rather than the IPv4 or IPv6 address you used previously. It should (after you accept the SSH warning that the server's name has a new name) work the same way your original SSH login did.
This will log you into your server as it did the first time, either as 'root' or the default unprivileged user. It's not considered good practice to access your server as root (it's too easy to completely screw it up by accident). Either way, best practice is to create your own separate 'non-root' user who has 'sudo' privileges and the ability to log in via SSH. If you are currently logged in as 'root', you can create a normal user for yourself via (replace [vps username] with your chosen username - in my case, I'd use U=dave):
U=[vps username]
adduser $U
adduser $U ssh
adduser $U admin
adduser $U sudo
You'll also want to a set a password for user [vps username] (we have a tutorial on creating good passwords):
passwd $U
then become that user temporarily (note, the root user can 'become' another user without needing to enter a password) and create an SSH key and, in the process, the .ssh directory (directories starting with a '.' are normally 'hidden' - you can show them in a directory listing via ls -a) for the file into which to put your public SSH key:
su $U
ssh-keygen -t rsa -b 2048
nano ~/.ssh/authorized_keys
and in that file, copy and paste (without spaces on either end) your current computer's public ssh key (never publish your private key anywhere!), save and close the file.
From that point, you should be able to SSH to your server via ssh [vps username]@[domain name] without needing to enter a password.
These instructions use 'sudo' in front of commands because I assume you're using a non-root user. The instructions will still work fine even if you're logged in as 'root' (the 'sudo' will be ignored).
Configure the VPS
First things first. Let's make sure you've got the time zone set appropriately for your instance. It'll probably default to 'UTC' (Greenwich Mean Time). For our servers, I tend to pick 'Pacific/Auckland' which is our time zone. Run this
sudo dpkg-reconfigure tzdata
and pick the appropriate timezone. You can just leave it running UTC, but you might find it tricky down the track if you're looking at logs and having to constantly convert the times into your timezone.
In the rest of this tutorial, we're going to be editing quite a few files via the command line. If you're new to this, I recommend using the 'nano' text editor which is installed by default on Ubuntu Linux systems. It's fairly simple, and all of its options are visible in the text-based interface. I tend to use a far more powerful but far less beginner-friendly editor called 'vim'. There're other editors people might choose, too. To use your preferred editor for the rest of the tutorial, enter the following to set an environment variable EDIT, specifying your preferred editor, e.g.:
or, if you're like me
so that subsequent references to $EDIT will invoke your preferred editor. Note the command which nano is a script which finds the full path to the named command, in this case 'nano'. Putting it inside the backquotes `` means 'replace with the value the script returns', so it sets the value of EDIT to the path of the nano command.
Configuring your firewall
Let's configure our firewall. We work on the basis of allowing in only what we want to let in (i.e. 'default deny').
First we'll enable the use of SSH through the firewall (not doing this could lock us out of your machine!)
sudo ufw allow ssh
while we're here, we'll also enable data transfer from the internal (to the VPS) Docker virtual network and the IP range it uses for Docker containers:
sudo ufw allow in on docker0
sudo ufw allow from 172.0.0.0/8 to any
Then we'll enable forwarding from internal network interfaces as required for Docker containers to be able to talk to the outside world:
sudo $EDIT /etc/default/ufw
and copy the line DEFAULT_FORWARD_POLICY="DROP" tweak it to look like this (commenting out the default, but leaving it there for future reference!):
and then save and exit the file (CTRL-X and then 'Y' if your editor is nano).
You also have to edit /etc/ufw/sysctl.conf and remove the "#" at the start of the following lines, so they look like this:
sudo $EDIT /etc/ufw/sysctl.conf
Then we need to restart the network stack to apply that configuration change
sudo systemctl restart systemd-networkd
Next we have to enable the UFW firewall to start at boot time.
sudo $EDIT /etc/ufw/ufw.conf
And set the ENABLED variable near the top:
ENABLED=yes
Now you can formally start UFW now:
sudo ufw enable
Install NGINX
Next we need to install the NGINX webserver and reverse-proxy, as well as the Let's Encrypt SSL certificate generator, both of which are crucial for any secure webservices you might want to host. NGINX is a more efficient and flexible alternative to the older Apache webserver you might've seen elsewhere.
sudo apt-get install nginx-full letsencrypt
You'll get a couple pop-up windows in your terminal, just hit ENTER to accept the defaults. Having installed it, we need to create firewall rules to allow external services to see it:
sudo ufw allow 'Nginx Full'
You can check if the firewall rules you requested have been enabled:
sudo ufw status
Outgoing VPS Email
It's very useful for your server to be able to send out emails, like status emails to administrators (perhaps you) about things requiring their attention, e.g. the status of backups, pending security updates, expiring SSL certificates, etc. To do this, we'll set up the industrial strength Postfix SMTP server, which is pretty quick and easy. First we install Postfix.
sudo apt-get install postfix bsd-mailx
During the install, you'll be asked to select a bunch of configuration parameters. Select the defaults except:
- Select "Internet Site with Smarthost",
- fill in the domain name for your server [domain name],
- the [smtp server] name and [smtp port] (in the form [smtp server]:[smtp port], e.g. smtp.oeru.org:587 ) of your "smarthost" who'll be doing the authenticating SMTP for you, and
- the email address to which you want to receive system-related messages, [your email].
After that's done, we set a default address for the server to mail to, to [your email] selected above. First
sudo $EDIT /etc/aliases
We need to make sure the "root" user points to a real email address. Add a line at the bottom which says (replacing [your email] with your email :) )
root: [your email]
After which you'll need to convert the aliases file into a form that postfix can process, simply by running this:
sudo newaliases
Then we have to define the authentication credentials required to convince your mail server that you're you!
sudo $EDIT /etc/postfix/relay_password
and enter a single line in this format:
[smtp server] [smtp user]:[smtp password]
as an example, this is more or less what I've got for my system. Note that the [smtp user] in my case is an email address (this is common with many smtp system - the user is the same as the email address):
smtp.oerfoundation.org smtp-work@fossdle.org:SomeObscurePassw0rd
then save the file and, like the aliases file, run the conversion process (which uses a slightly different mechanism):
sudo postmap /etc/postfix/relay_password
Finally, we'll edit the main configuration file for Postfix to tell it about all this stuff:
sudo $EDIT /etc/postfix/main.cf
If your SMTP server uses port 25 (the default for unencrypted SMTP) you don't have to change anything, although most people nowadays prefer to use StartTLS or otherwise encrypted transport to at least ensure that your SMTP authentication details (at least) are transferred encrypted. That means using port 587 or 465. If you're using either of those ports, find the "relayhost = [your server name]" line... and add your port number after a colon, like this
relayhost = [smtp server]:[smtp port]
or, for example:
relayhost = smtp.oerfoundation.org:465
Then we have to update the configuration for Postfix to ensure that it knows about the details we've just defined (this command will automatically back up the original default configuration so you can start from scratch with the template below):
sudo mv /etc/postfix/main.cf /etc/postfix/main.cf.orig && sudo $EDIT /etc/postfix/main.cf
You can just copy-and-paste the following into it, substituting your specific values for the [tokens].
Once you've created that main.cf file, you can double check that your config is valid:
sudo postfix check
and if it's all ok, you can get Postfix to re-read its configuration:
sudo postfix reload
You can then try sending an email so see if it works!
By default, a command line application called "mail" is installed as part of the bsd-mailx package we installed alongside postfix. You can use it to send test email from the command line on your host to verify you've got things working correctly! The stuff in <> are the keys to hit at the end of the line...
$ mail you@email.domain<ENTER>
Typing (hold down the Control or Ctrl key on your keyboard and press the "d" key) will finish your message, showing you a "CC:" field, in which you can type in other email addresses if you want to test sending to multiple addresses. When you then hit , it will attempt to send this email. It might take a few minutes to work its way through to the receiving email system (having to run the gauntlet of spam and virus filters on the way).
You can also always check the postfix system logs to see what postfix thinks about it using the command:
sudo less +G /var/log/mail.log
if your system doesn't have a /var/log/mail.log, never fear! Try this instead:
sudo less +G /var/log/syslog
In either case, hit to have the log update in real time.
Docker Compose and Let's Encrypt
The next step is to set up the file structure for holding your Docker configurations and the data your Docker containers will access. This is my convention, so you're welcome to do things different, but this is a 'known good' approach.
First let's install Docker Compose (and its dependencies, like the whole Docker subsystem) and the Let's Encrypt scripts that let you procure no-cost Secure Sockets Layer certificates to secure access to your Mastodon (and anything else you might want to host on this server).
sudo apt install docker-compose letsencrypt
Now we create the set of directories I use for holding Docker Compose configurations (/home/docker) and the persistent data the Docker containers create (/home/data)
It's helpful to make sure that your non-root user can also read and write files in these directories:
Install the Mastodon Docker recipe
Now we have a place to put the really key bit - the code for running Mastodon via Docker Compose - first we go to the right place to set things up:
cd /home/docker
and then we use an amazing tool called 'git' to download the canonical code created by the Mastodon developers. Of course, replace [domain name] in the following with the one you've selected (for the record, this command should work without sudo because we changed the ownership of the director in the previous step to belong to your unprivileged user).
git clone https://github.com/tootsuite/mastodon.git [domain name]
Then you can go into the directory
cd [domain name]
Have a look around. Use ls -la to see what files and directories (including 'hidden' ones, whose names start with a '.') the project includes. They key files in this case are the .env.production.sample and docker-compose.yml. You can ignore the rest for the time being.
The first thing we want to do is create a .env.production file - this will hold all the crucial details of your Mastodon instance. Do it like this:
cp .env.production.sample .env.production
and then edit it (if EDIT isn't defined, because you're in a different session now, you might need to reset it as described above):
$EDIT .env.production
The following is what I've got (replace the [tokens] as usual). Make sure you get your SMTP details right - if you don't, you can fix them, but you won't get any emails from the instance until you do! Note that there're five (5) special numbers that you'll need to set later - but don't worry about them for the moment.
Once you've save that, we can create the docker-compose.yml file. I recommend creating a backup version of the original file in case you want to refer back to it:
cp docker-compose.yml docker-compose.yml.orig
Then you can edit the file via
$EDIT docker-compose.yml
Replace any [tokens] with your values. Note that the version of Mastodon at the time of this writing is 4.0.1 - to use a different version (e.g. if you are reading this tutorial after Eugen releases Mastodon 4.x (see the current release) you'll just want to replace all occurrences of 4.0.1 below with the appropriate version number.
Note, the 'build' commands are commented out here as we're using pre-built containers rather than building them locally (as that takes a lot of time and potentially requires a fair bit of disk space, at least temporarily). If you want to do a build, you'll want to uncomment those lines.
Note: the port numbers in the docker-compose.yml file need to match those in the NGINX reverse proxy configuration.
Once you've got this file configured, you should be ready to 'pull' your Docker containers! To do that, run
docker-compose pull
Once that's finished, you'll need to get three secret numbers: SECRET_KEY_BASE, OTP_SECRET, and PAPERCLIP_SECRET. Run the following three times and record the numbers (doesn't matter which one goes where, but once you set them, you don't want to change or lose them!):
docker-compose run --rm web bundle exec rake secret
Then you need to get the two VAPID keys - running this will provide both:
docker-compose run --rm web bundle exec rake mastodon:webpush:generate_vapid_key
Copy these into your .env.production - I encourage you to record them elsewhere as well - a password manager is a good place!
$EDIT .env.production
After that, your Mastodon is ready to roll! But there's one more crucial step - we need to set up the reverse proxy server which provides the secure (encrypted) access to your instant for you and all your users.
NGINX reverse proxy configuration
For the reverse proxy, we'll use the NGINX web server we installed earlier. It stores all of its configuration in the directoy /etc/nginx.
The first thing we'll do is create a couple directories we need:
This is where Let's Encrypt will look for a secret code we put here to verify that we own the domain we're requesting an SSL certificate for:
sudo mkdir /var/www/letsencrypt
Then we create a place to the Let's Encrypt NGINX configuration details
sudo mkdir /etc/nginx/includes
And then we create that configuration file
sudo $EDIT /etc/nginx/includes/letsencrypt.conf
into which we copy-and-paste the following (no [tokens] to replace in this one!)
Next we have to create the reverse proxy configuration file for our Mastodon domain name (and any other domain names we might want to use):
sudo $EDIT /etc/nginx/sites-available/[domain name]
Again, we have the convention of using the [domain name] to identify this file. It's self-documenting. Copy-and-paste the following into, making [token] substitutions. Note that the port numbers (usually after a ':') need to correspond to the port numbers specified in the docker-compose.yml file.
We initially comment out the SSL certificate paths for our [domain name] in the above configuration because we haven't yet created those certificates, and NGINX won't run with missing certificates (a trap for young players!). So we temprarily substitute the default (not domain-specific) "snakeoil" certificates that are provided with every Linux installation to act as valid certificate placeholders to run NGINX so that we can then request Let's Encrypt certificates.
After we've save the NGINX configuration, we need to make sure it's also in the sites-enabled directory, so NGINX will see it (it ignores those merely in sites-available, which is sort of a holding pen for potential site configurations):
sudo ln -sf /etc/nginx/sites-available/[domain name] /etc/nginx/sites-enabled/
before we can test our NGINX confguration for errors, we need to address the file, /etc/ssl/certs/dhparam.pem, our config file references but which doesn't yet exist by creating it like this:
sudo openssl dhparam -out /etc/ssl/certs/dhparam.pem 4096
Note this process can take quite a long time, like 10-40 minutes depending on your VPS and the 'entropy' it generates. If you're short of time, cancel the one running (CTRL+C) and run it again with 2048 rather than 4096 specified. It'll make your installation marginally less secure.
after which we can ask NGINX to test its configuration for errors:
sudo nginx -t
Fix any errors you might find (e.g. typos, missing punctuation, etc.) and after nginx -t tells you you've got valid configurations, reload NGINX to enable the new configuration:
sudo service nginx reload
Once that's working, your server is configured to respond to external requests for you site via [domain name] via http:// (not encrypted), and via https:// (encrypted, although pointing your browser at https://[domain name] right now will get your warnings that you've got a mismatch between your certificate and your domain name.). So, of course, the next step is to generate a certificate for [domain name].
Let's Encrypt can award a certificate to you because it can confirm that you (who control [domain name]) also control the server. They verify it by pointing their infrastructure at your [domain name] - recalling that your domain is pointed at your VPS' IPv4 (the A record above) and (if used) IPv6 (the AAAA record above) - and checking in pre-defined location (see the letsencrypt command below) to see if, at that location they can find a secret number that you've asked them to write there. If they find it, they can trust that you control both the [domain name] and the VPS it's pointing to.
Here's the command that will request Let's Encrypt's systems to run that check - it will verify that all the domain names specified (with a -d flag are a) pointing at your VPS, and b) their scripts can see the secret number the specified location, in this case in /var/www/letsencrypt):
letsencrypt certonly --webroot -w /var/www/letsencrypt -d [domain name] -d [second domain name]
Here's what you're likely to see as output from the first run of the letsencrypt script - note that it will ask you for an email address (so it can send you warnings if your certificate is going to expire, e.g. due to a problem with renewal (like if you make a configuration change that breaks the renewal process)).
Ideally, you'll see a message like the above. If not, and there's an error, the error messages they provide are usually very useful and accurate. Fix the problem and try again. Note, your SSL certificate will have the name of your [domain name], even if it also provide support for [second domain name] (or third, fourth, etc.).
Once you have a Let's Encrypt certificate, you can update our NGINX configuration:
sudo $EDIT /etc/nginx/sites-available/[domain name]
and swap all occurrences of
to
which enables your new domain-specific SSL certificate. Check that NGINX is happy with your change:
sudo nginx -t
and if so,
sudo service nginx reload
You domain should now be fully enabled for https:// access. Note that going to http://[domain name] should automatically redirect you to https://[domain name] because you care about your user's security! :grin:
We're in the final stretch now!
Build your Mastodon
To actually launch your Mastodon instance you first have to create the structure for database in the PostreSQL container. You can do that Virtual
docker-compose run --rm web rails db:migrate
This will temporarily spin up your 'web' container (which, in turn depends on your PostgreSQL container, aka 'db') and run the 'migration' script which either updates (or creates, if it's not already there) your database tables.
Ok - it's finally time to launch your Mastodon instance. Running this will fire up all of your containers using the values in your .env.production file.
docker-compose up -d && docker-compose logs -f --tail=100
After it initiates the containers with the up -d command, it opens a logging interface which allow you to watch the log messages from all the containers (only including the most recent 100 lines at the time you run it), which is very helpful in the event that something goes wrong - you should be able to see what it is.
You can always stop your Mastodon instance via
docker-compose stop or individual containers via, for example, the 'sidekiq' container, docker-compose stop sidekiq.
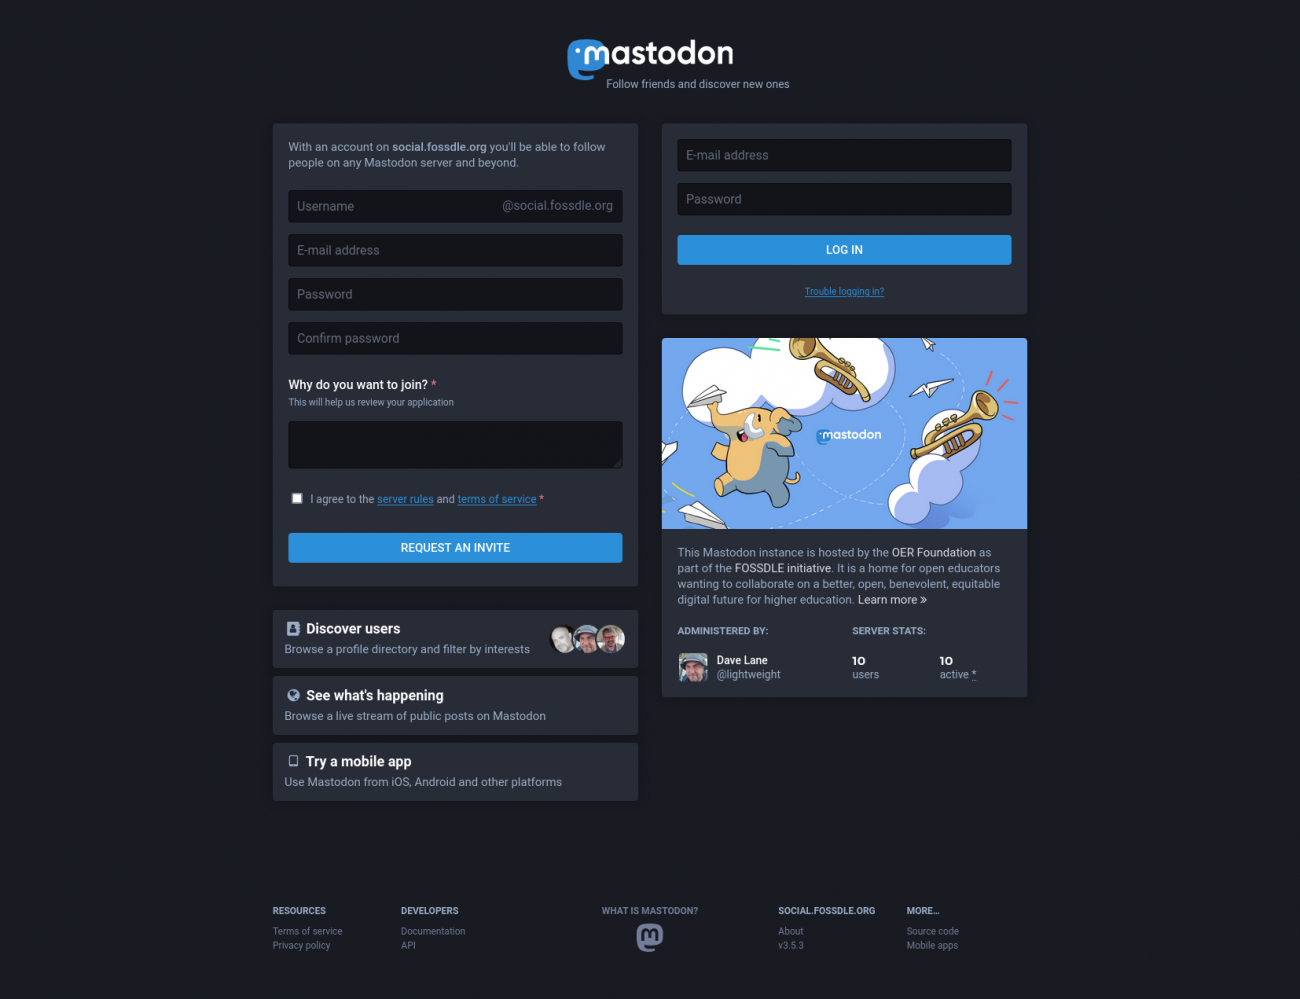
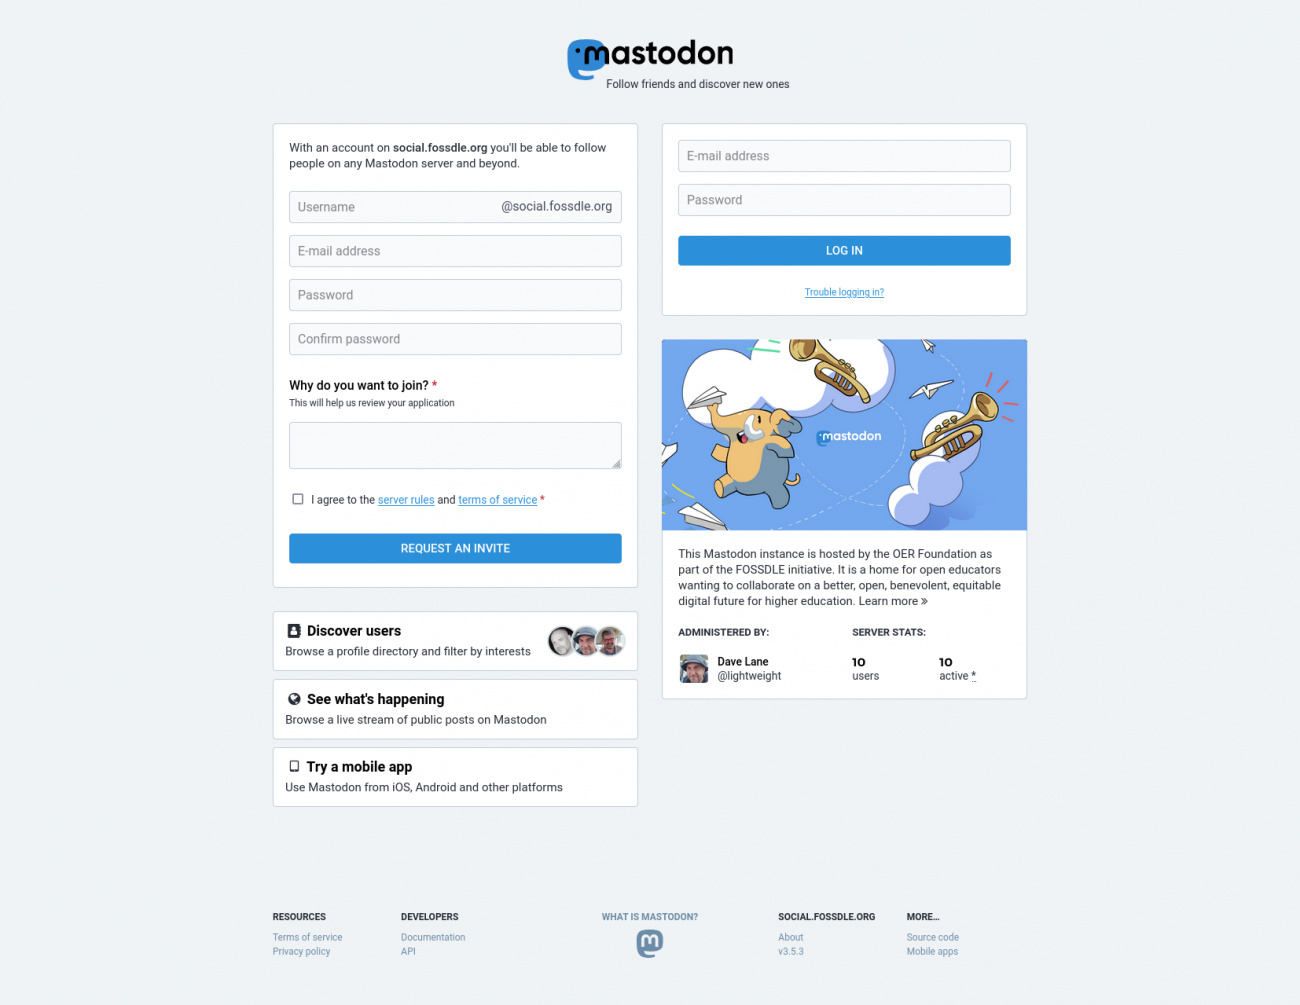
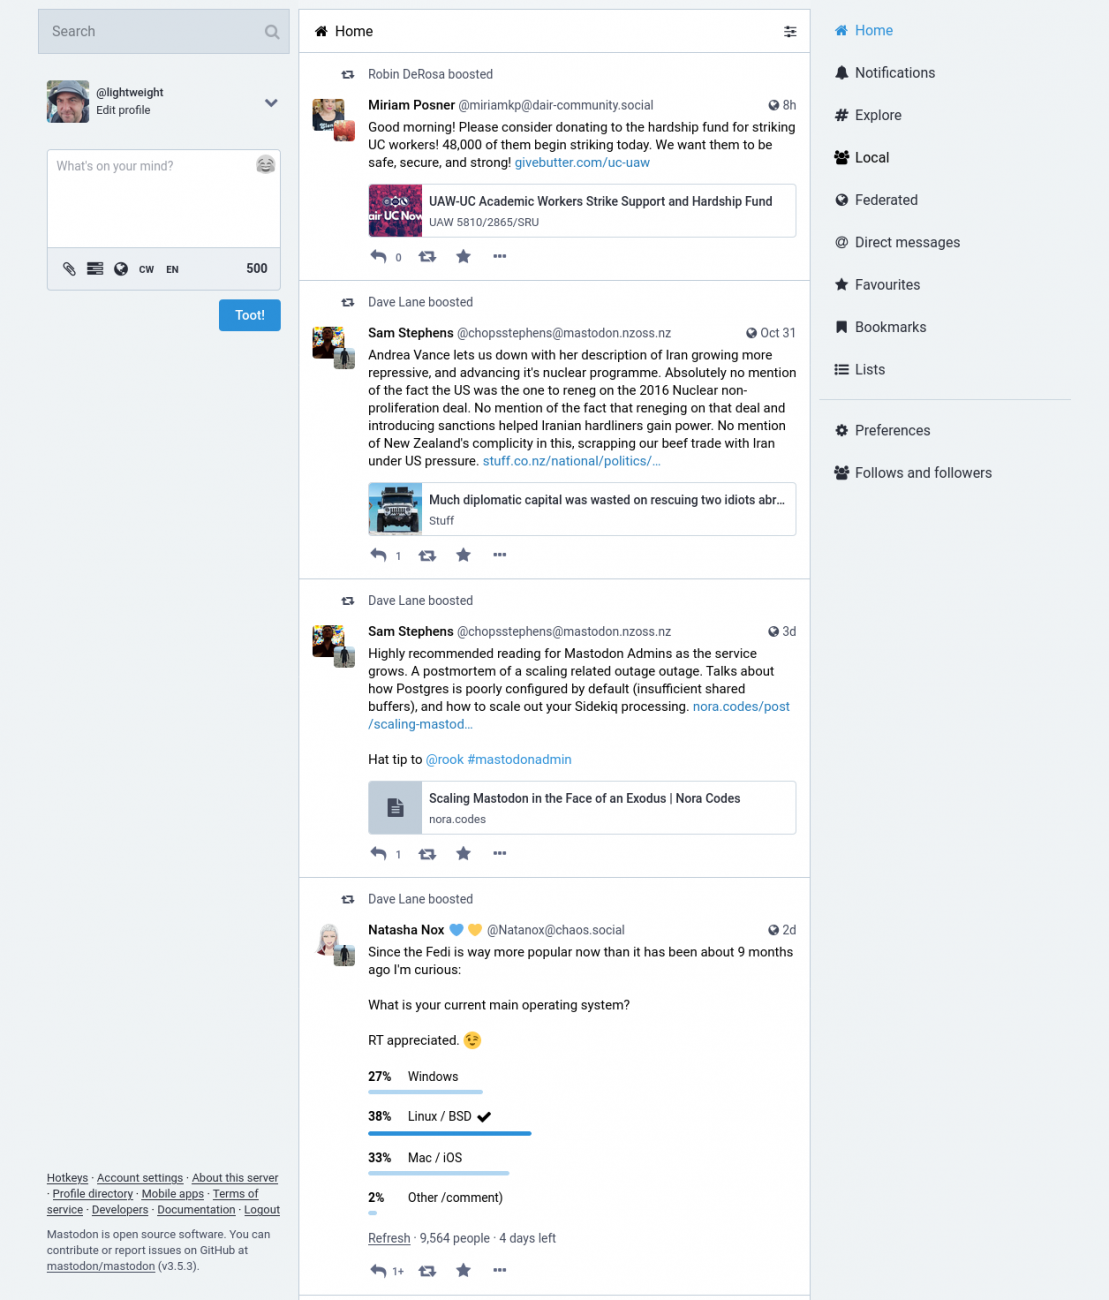
Now your Mastodon should be running. You can point your browser at https://[domain name] and you should be greeted by a sight similar to the first screenshot above (although it'll have your site's [domain name] rather than social.fossdle,org, which is the site I recently deployed and was the basis for setting up this tutorial). Your login page will just have generic information as it hasn't been configured yet, and doesn't have any users, administrative or otherwise.
If your site is missing the "mastodon" image below the Log In form, it might be that your 'assets' haven't been pre-compiled. If that's the case, just run this:
docker-compose run --rm web rails assets:precompile
which will re-compile them.
Create your Admin user
What you now need to do is create a user with [mastodon username] for the administrator of the site. That can be your own user or a dedicated admin user. It's up to you. I tend to make my personal user the admin user. You'll just follow the instructions on the start page to create a new account. All going well, you'll receive an email from the site asking you to verify your email address, and then you'll get a welcome email. At this point, you can log in, although you'll just be a generic user, not an admin. To change your user into an admin user, you'll need to run
docker-compose exec -e RAILS_ENV=production streaming bin/tootctl accounts modify [mastodon username] --role admin
If it's successful, you should see
OK
At that point, you can do a refresh of your logged in session in your Mastodon instance, and you'll be the Administrator! Congratulations! You've done it.
Now, you'll just want to do some basic configuration of your instance... and then you can let others know about it!
Basic Instance configuration
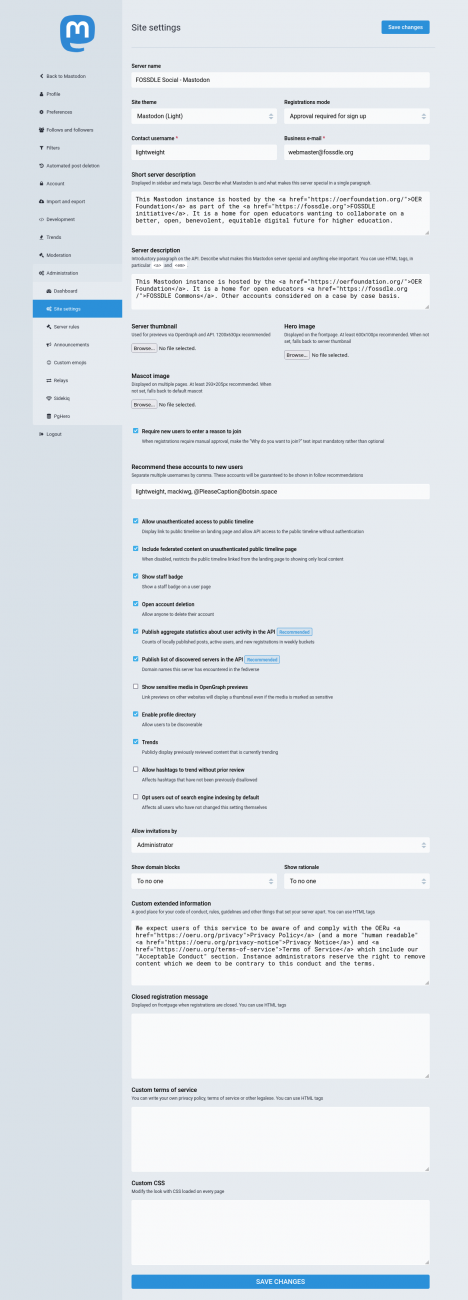
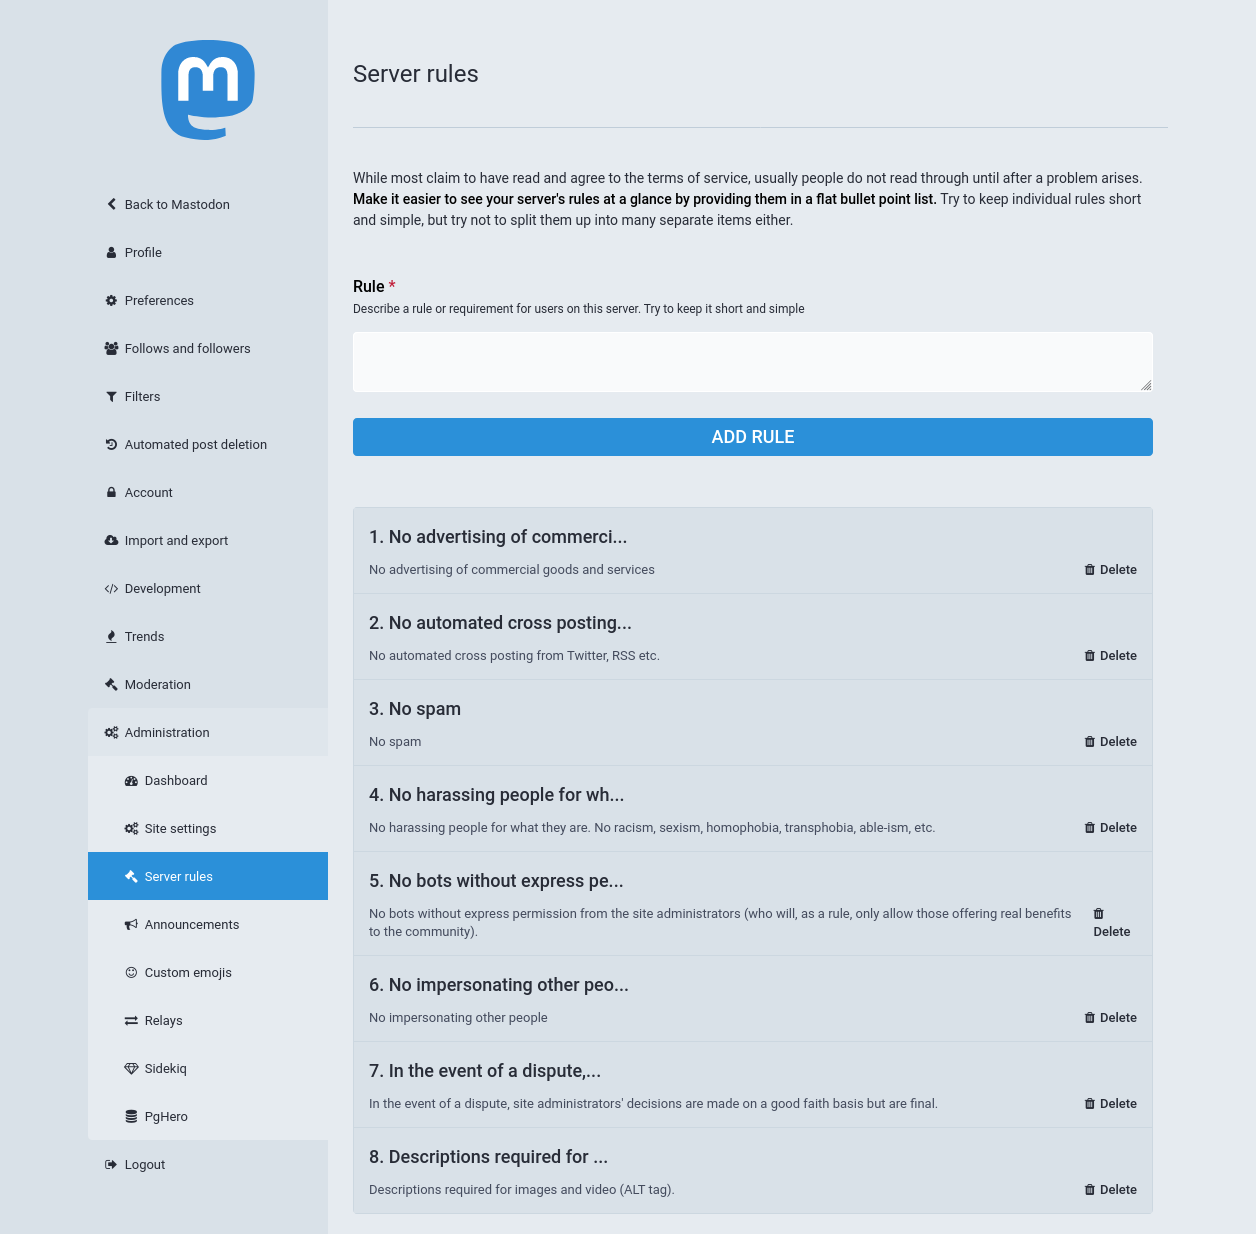
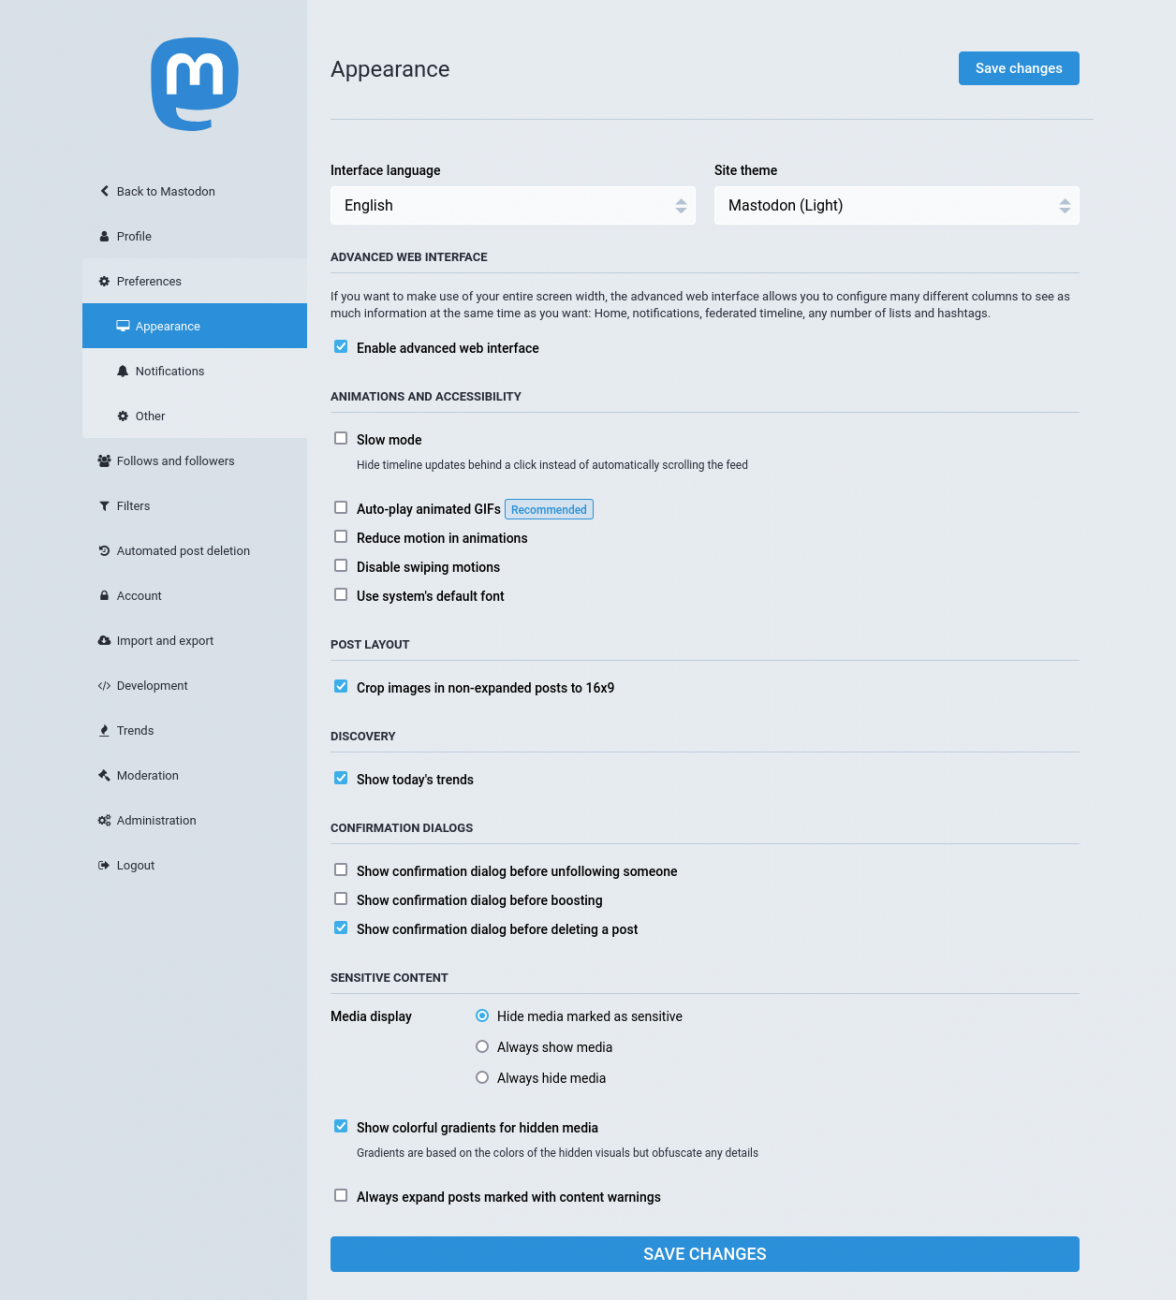
Once you've got your admin user working, you'll want to go to the "settings" for your user (the little 'gear' near the bottom right of the right column in the default interface, or at the top right of the left column of the advanced interface) and from the resulting menu, you should be able to select the 'Administration' option. The first thing to do is to go to 'Settings' and fill in as much as you need to - I've included a screen shot of our settings page on social.fossdle.org for your reference. You should also set some 'instance rules' - I've included another screenshot showing our instance rules - you can always check them out for yourself - you're welcome to borrow (any|every)thing from them.
After all that's set up, you're ready to go! You can start following other users - one useful trick to know about is that you can go to any other instances you know about via their web address (or go to the main Mastodon help site and look for other instances) and you can explore the 'profile directory' on any other instance. Clicking on a user's name (bold text) will pop up a box in your browser allowing you to elect to follow that user by typing in your Mastodon handle - it'll be [mastodon username]@[domain name] - in the provided form, and then selecting the 'Follow' button. Alternatively, you can copy-and-paste a user handle (below a user's name in their profile directory) into the Search bar in your Mastodon interface - it should show you the same profile info in your own Mastodon's interface window, and you should be able to follow with a single click on the "Follow" button or the little 'follow user' icon (greyed out head with a + after it). If you're already following a user, you'll see a blue 'user being followed' icon (with a blue x next to it) that, if clicked, will unfollow that user.
Other considerations
Ok, you're in business, but there're a few loose ends to tidy up (after the well-earned euphoria of your new found power and place die down a bit!). These are things that any production web service needs to have, to ensure that you're looking after both your own (and, just as important!, your fellow users') data and generally running a secure, tight ship.
Backing up the Mastodon Database
The first is that you need to have regular backups of the PostgreSQL database that underlies the whole Mastodon instance. I've published a backup utility that we use at the OER Foundation to back up our Docker containerised PostgreSQL instances every hour! By the way, PostgreSQL is an amazing database, both FOSS and world-class, that's used by many of our FOSS services! We would use it over, say, the vastly more expensive proprietary database, MS SQL Server, any day of the week. In many ways, PostgreSQL is more capable, and quite a lot faster besides.
I'll aim to write another (shorter!) tutorial on how to implement this system in the next week or two.
Backing up your VPS' files and configurations, incuding your Mastodon
Also, you'll need to make sure that all the important files (configuration and data) on your VPS are being backed up, and ideally sent somewhere remote to your VPS in case something happens to it (rare though that might be), like it gets cracked by ne'er-do-wells or your hosting company suddenly goes belly-up (haven't heard of it happening, but there's always a first time!)...
We use an amazing FOSS tool called Restic. It allows us to make automated remote incremental backups of the VPS filesystem (including the frequent database dumps created by the database backup script above), and it even encrypts them on the way to protect your users' data even if the backup server is somehow compromised. This is best practice. I've also created a script to deploy Restic, and will need to write another tutorial to provide some more explanation.
To use this script, you'll need somewhere (that's accessible from the internet) to which you can send our backups! That's either a server with big hard disks in someone's home (with an externally visible network and a properly configured router), or some other backup location, like a commodity object store (often these are advertised as 'AWS S3-compatible') or a big internet-addressible block storage device. The Restic site will provide some guidance on this.
Upgrading your Mastodon instance to newer versions
Last, Mastodon's developers seldom rest for long. Eugen and the rest of the Mastodon developer community are constantly looking at how they can improve Mastodon, or fix any issues that might emerge. While I was composing this tutorial, the current release version went from 3.5.3 -> 4.0.0. -> 4.0.1 in a matter of a couple hours. You don't need to upgrade your instance every time there's a new release, although you do want to apply any security-specific upgrades as quickly as possible to minimise the window of time that your instance is vulnerable!
I'll need to write another tutorial on how to do updates, but you should find basic instructions on each release! If your instance is not current at the time of a new release, make sure you read the intervening release notes, too as there are sometimes special instructions for a given jump from one release to the next.
Always make sure you have valid backups, ideally on the same VPS, before you do an upgrade so that you can roll back in the event the upgrade fails for some reason!
Well done reading through this screed of techno-text! I hope it was a lot quicker to read than it was to write (sheesh! I think I need a lie-down). All the best with your adventures in the Fediverse as a full-fledged contributing member!!
Blog comments
I get permission denied as…
I get permission denied as user or root on:
Then we'll enable forwarding from internal network interfaces as required for Docker containers to be able to talk to the outside world:
sudo $EDIT /etc/default/ufw
Did you define an editor …
In reply to I get permission denied as… by nick (not verified)
Did you define an editor (which happens prior to that line, e.g. EDIT=which nano or EDIT=which vim)?
Well written article however…
Well written article however, i think you ned to set passwords for the Postgres and Elastic in .env.production as docker-compose run --rm web rails db:migrate fails.
Also I think if you want the resulting docker containers to work on Ubuntu 22.04 then you'll need to add
sudo iptables -t nat -A POSTROUTING ! -o docker0 -s 172.0.0.0/8 -j MASQUERADE
Thanks for that, David. Will…
In reply to Well written article however… by David Field (not verified)
Thanks for that, David. Will double check that the next time I do a Mastodon setup - but, for what it's worth, this configuration works for me without the NAT iptables rule, and I didn't have issues with the db:migrate passwords (I generally disable Elastic, for what it's worth)...
Add new comment