Installing and Upgrading Moodle with Docker Compose on Ubuntu 22.04


Note: work in progress
Moodle is probably (there's little agreement among the pundits) the market-leading Free and Open Source Software (FOSS) Learning Management System (LMS). It's pretty much everywhere. Here's how you can set up and maintain your own Moodle instance(s).
Prerequisites
If you would like to host your own (and we certainly encourage it!) using the same approach we use at the OER Foundation here is how you get started:
- Set up a Virtual Private Server (VPS) and configure it to run Ubuntu Linux and Docker Compose.
- Make sure any administrative users can log into the VPS securely via Secure Shell (SSH).
From that point, use the following process.
Installing Moodle on Ubuntu 22.04 with Docker Compose
The process for completing the install involves
-
setting up a domain name (or subdomain) to point at the server so people can easily find the Moodle site,
-
installing all the relevant code via 'Git' on the VPS' file system,
-
configuring the Docker Compose file, defining the set of Docker containers comprising this site's moving parts, and 'pulling' the component containers (to download the current versions of each to our VPS),
-
adding the 'default configuration' for the Dockerised NGINX instance, so it knows how to server Moodle from the adjacent containers,
-
configuring the NGINX webserver running on the VPS to act as a 'reverse proxy' as well as using to generate a Let's Encrypt Secure Sockets Layer (SSL) certificate to encrypt and otherwise secure users' interactions with the Moodle instance, and finally
-
configuring the Moodle instance itself.
Configure a domain name
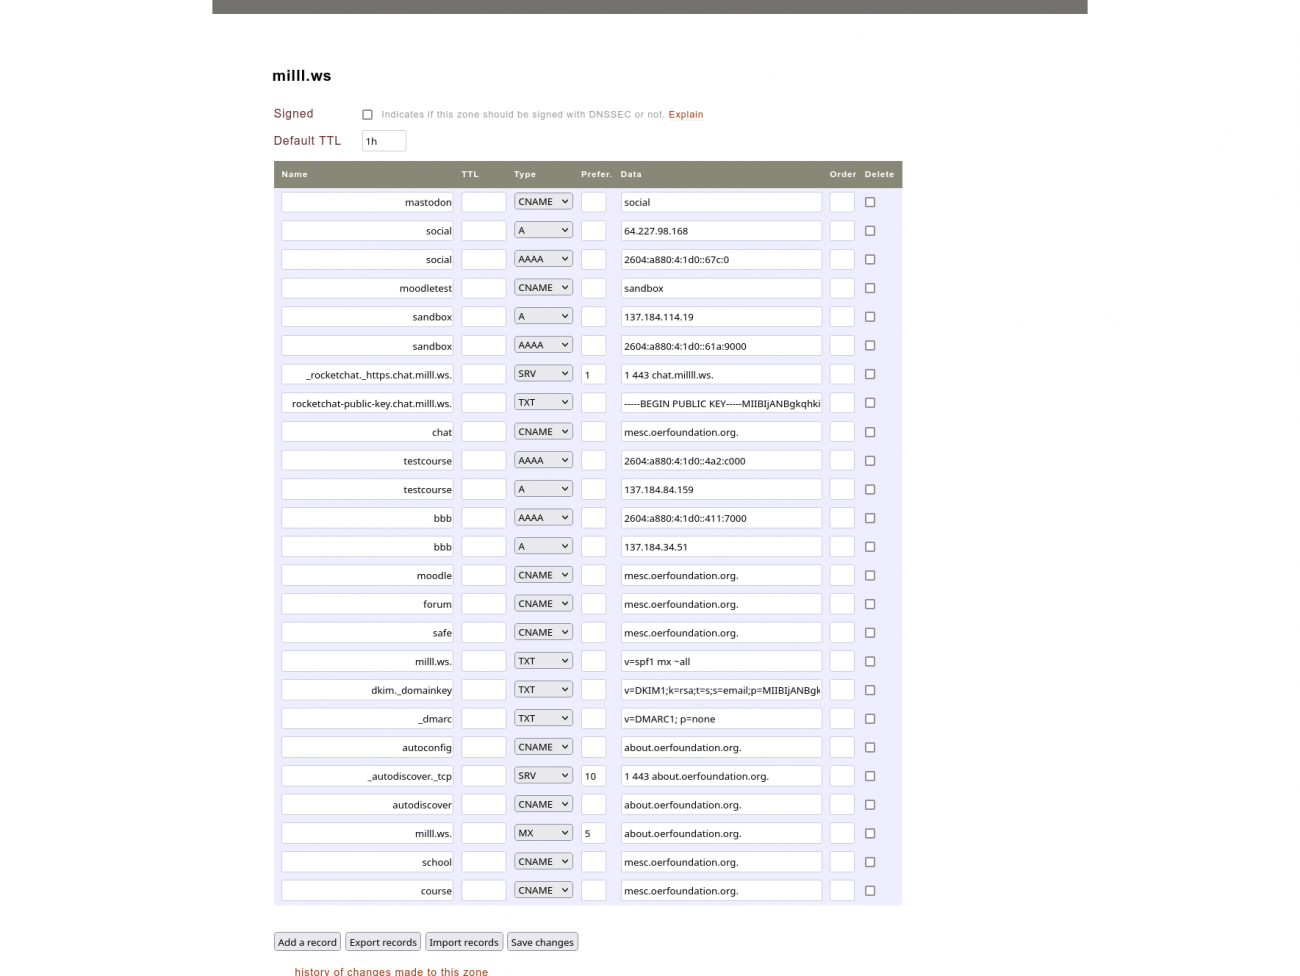
Configuring a domain name requires us to register a domain with a 'domain registrar' - we use one called Metaname, based here in Christchurch, New Zealand - and using the registrar's browser based configuration system to create a 'zone file' which defines the server to which the domain points. Each registrar is likely to have their own bespoke zone file configuration tools, so consider this to be just one example.
Our convention at the OERF is to allocate a default domain name to each VPS we create. Each one hosts one or more Free and Open Source Software services. Each of those services has its own domain name. Usually we designate "A" and "AAAA" records for the default domain name pointing to the IPv4 and IPv6 addresses given to the VPS by the cloud services provider.
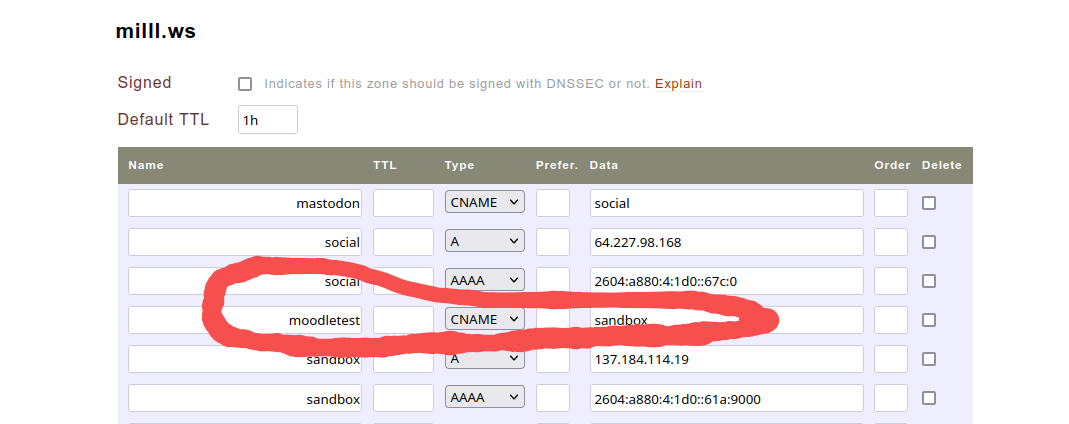
For the purposes of this tutorial, we'll create a site called moodletest.milll.ws which is the moodletest subdomain of the milll.ws (Ministry for Education, Sport, and Culture's 'innovative Lifelong Learning Lab', aka MiLLL, in (western) Samoa). We use a "CNAME" to point the subdomain at the VPS' official name, sandbox.milll.ws, which is how its A and AAAA records identify it (via its IPv4 and IPv6 addresses).
So our "Fully Qualified Domain Name" (FQDN) is moodletest.milll.ws.
To prepare for the rest of this tutorial, we're going to set a variable for your selected domain name. Do that by typing this at your command prompt. It will set this variable ''for this session'':
FQDN=your domain name
in our case, it'd be
FQDN=moodletest.milll.ws
The following will assuming that this value is set correctly.
Install the Moodle source code
Before we can install the Moodle source code, we have to prepare a sensible place for it to live. We do that by creating suitable directories for both the Docker configurations and the Moodle instance data and configuration as follows:
sudo mkdir -p /home/docker/${FQDN} /home/data/${FQDN}
That creates two directories as you can see. We need to go into the data directory:
cd /home/data/${FQDN}
and in there, we'll execute this git command to download the entire Moodle codebase:
sudo git clone https://github.com/moodle/moodle.git src
When that finishes, go into the source directory:
cd src
Here, we'll have to execute this new command, which we use to declare this a 'safe' git directory, which helps protect us from nefarious parties running git commands in dangerous places if they can get access to our server via some other security vulnerability...
sudo git config --global --add safe.directory /home/data/${FQDN}
Then we can run this comman:
git branch -a
This should give you a list of all the Moodle repository version 'tags'.
In this case, we're going to install a stable (but not the latest) version of Moodle - to do that we tell git what tag we're going to track:
sudo git branch --track MOODLE_310_STABLE origin/MOODLE_310_STABLE
And then, to make sure that our Docker container's nginx webserver can read these files (they need to be owned by the www-data users, and I (user 'dave') can run git commands without needing to use sudo. Replace with your own user name here!
Configure Docker Compose to host Moodle
The first step to running anything with Docker Compose - which helps you combine a set of Docker containers together into a useful, maintainable service - is to create docker-compose.yml file. It usually contains the full 'recipe' for the service.
Go to the relevant docker directory and create and edit the file:
cd /home/docker/${FQDN}
sudo nano docker-compose.yml
And copy and past in this content (with FQDN occurrences and [secret password] placeholders to be replaced appropriately, of course):
And, naturally, save the file.
Note, the last stanza of the docker-compose.yml file, defining the NGINX component, specifies a port number on the host machine (i.e. 'localhost' or 127.0.0.1) of 8080, which in turn points to port 80 on the NGINX container. If this is the only Docker Compose configuration on your server, then 8080 is probably an avaiable port to use, but if you server has lots of other Docker Compose (or other sorts of services on it) port 8080 might not be available. You can check by running
sudo netstat -punta
If netstat isn't installed, you can install it via sudo apt install net-tools.
Running this command will give output that looks something like this:
You'll notice that in this case, the 7th line says
tcp 0 0 127.0.0.1:8080 0.0.0.0:* LISTEN 94497/docker-proxy
which means that port 8080 is already in use with 127.0.0.1 on the server and trying to start my containers with that port defined would result in a 'port unavailable' error.
Here's a quick one-liner allowing you to check whether any particular port is in use right now (replace '8080' with whatever port number you're checking):
sudo netstat -punta | grep '8080'
if it returns nothing, that port is ''currently'' unused. If it returns a line like
tcp 0 0 127.0.0.1:8080 0.0.0.0:* LISTEN 94497/docker-proxy
it's in use and you'll need to choose another port, e.g. 8081 or 8070 or something else. Ports over 8000 are unlikely to be used by most normal software so should be fair game. You can verify that your selected port is available before launching your containers.
Download your containers from Docker Hub
You should then be able to 'pull' the relevant Docker images (might take a while depending on your server's location and available bandwidth):
sudo docker-compose pull
Once that's done, we need to make sure that our container running NGINX webserver has a valid Moodle-specific configuration.
Configure NGINX container for Moodle
To do that, we're going to create an NGINX default configuration for the Moodle containers by creating and editing the file:
sudo nano /home/data/${FQDN}/nginx/default.conf
copying and pasting in the following content. It shouldn't require any changes.
Once this is in place, you can start up the Docker containers like this (as your own user!):
docker-compose up -d && docker-compose logs -f
which will start the containers (the up -d) in 'daemon mode', where they continue to run even if you log out of the server, and then show you the logging from the containers (the logs -f) part. To exit the log view (which will update automatically as more log messages are created), hit the CTRL-C key combination. If there're any errors from your individual containers, they should visible here.
That's it, your Docker containers should be running. Once you're out of the log view, you can always check on your containers by going into the /home/docker/FQDN directory and executing:
docker-compose ps
which should show you a list of the currently running containers and their states. Here's an example:
or, to get a bit more info, you can run
docker-compose top
which should show you a bit more information about the different running containers and their active processes. Here's an example:
So, now we should have all the relevant containers for your Moodle instance running... Al that's left to do is hook up the reverse proxy configuration creating that last vital link: between your browser's request and the Moodle service (secured by Let's Encrypt)!
Create a secure reverse-proxy configuration
The first step to doing that is to create a reverse proxy configuration:
sudo nano /etc/nginx/sites-available/${FQDN}
Copy and paste the following into the file. Of course, you will want to replace every occurrence of 'FQDN' with your own domain name.
Once you've saved that file, we need to make sure NGINX can see the configuration - we do that by creating a 'symbolic link' between our configuration file in the sites-available directory and the sites-enabled directory as follows:
sudo ln -sf /etc/nginx/sites-available/${FQDN} /etc/nginx/sites-enabled/
Before we can restart NGINX with this new configuration, we have to make sure that the 'letsencrypt.conf' cited in our configuration file exists. We do that by creating a new directory:
sudo mkdir /etc/nginx/includes
and creating the letsencrypt.conf file:
sudo nano /etc/nginx/includes/letsencrypt.conf
into which we copy and paste the following:
In turn, we also have to make sure that the directory stipulated in the letsencrypt.conf file exists - we'll attempt to create the directory, which won't hurt anything if it already exists:
sudo mkdir /var/www/letsencrypt
With that done, we can test NGINX's configuration:
sudo nginx -t
If it's free of errors (there might be a warning related to the snakeoil ''temporary'' certificates we've specified. That's ok - we just specified them so that we can get NGINX restarted in a way that let's us request an SSL certificate from Let's Encrypt!), we can get NGINX to reload its configuration, so that it'll know how to respond to requests for the FQDN domain!
sudo service nginx reload
If that returns without errors, we're in business! It's time to make our Let's Encrypt certificate. Creating one is easy:
sudo letsencrypt certonly --webroot -w /var/www/letsencrypt -d ${FQDN}
In our case, it's:
sudo letsencrypt certonly --webroot -w /var/www/letsencrypt -d moodletest.milll.ws
Running that should trigger output like this:
... which means you've successfully received a new certificate! Now you can update your NGINX reverse proxy configuration:
sudo nano /etc/nginx/sites-available/${FQDN}
to change it as follows (again, make sure you've replaced FQDN with your actual domain name!)
Once you've saved the file you can test your NGINX configuration:
sudo nginx -t
and if it doesn't return any errors (nor should it return warnings), you can reload NGINX's config to make your new secure configuration live!
sudo service nginx reload
Installing Moodle
Now that we've filled in all the parts of the tool-chain, your server is ready to receive requests for your Moodle site! You should be able to go to your web browser on your local computer and enter the URL, replacing FQDN with your domain name of course:
https://FQDN
(and entering http://FQDN should automatically redirect to https://FQDN - feel free to test it!)
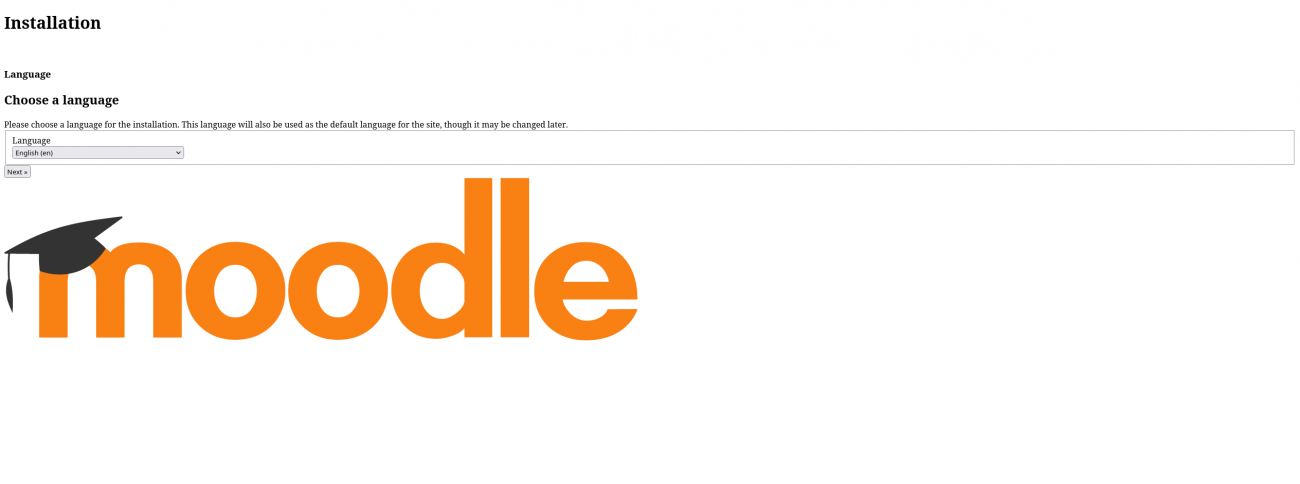
And if all is well, your Docker Compose stack running Moodle should respond by serving you up a page that looks like the attached "Install page" screenshot.
You'll probably notice it looks a bit rough, as, for the moment at least, the Cascading Style Sheets (aka CSS, the code that determines how web content looks) won't be loading correctly. We'll address that shortly.
We need to get through the installation of Moodle first, during which time, the Moodle system creates your config.php file in the /home/data/${FQDN}/src/ directory. Once that's created, you'll be able to edit the file and make the tweaks to fix this problem.
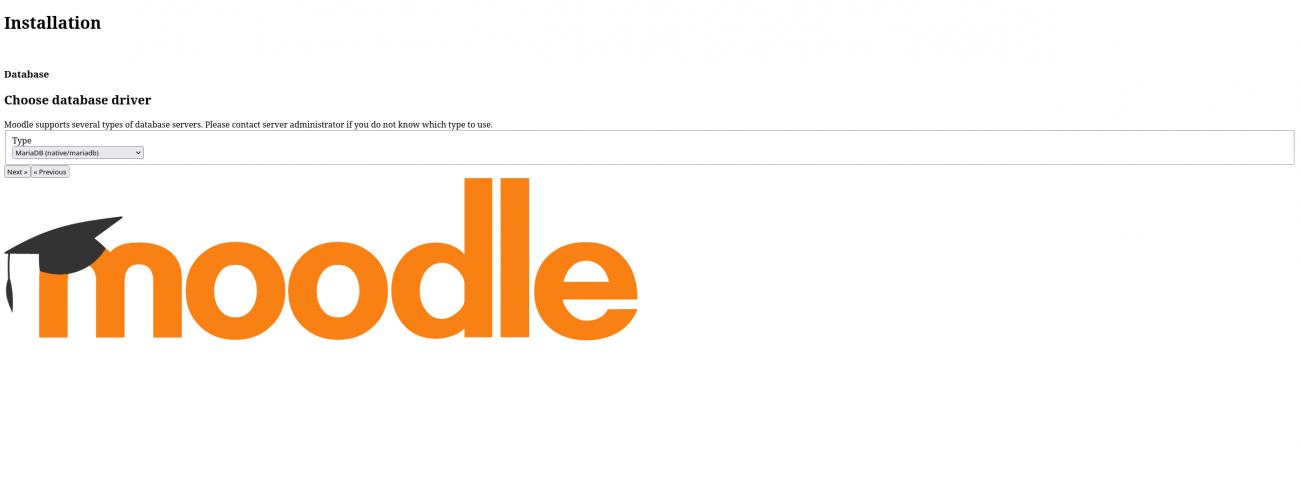
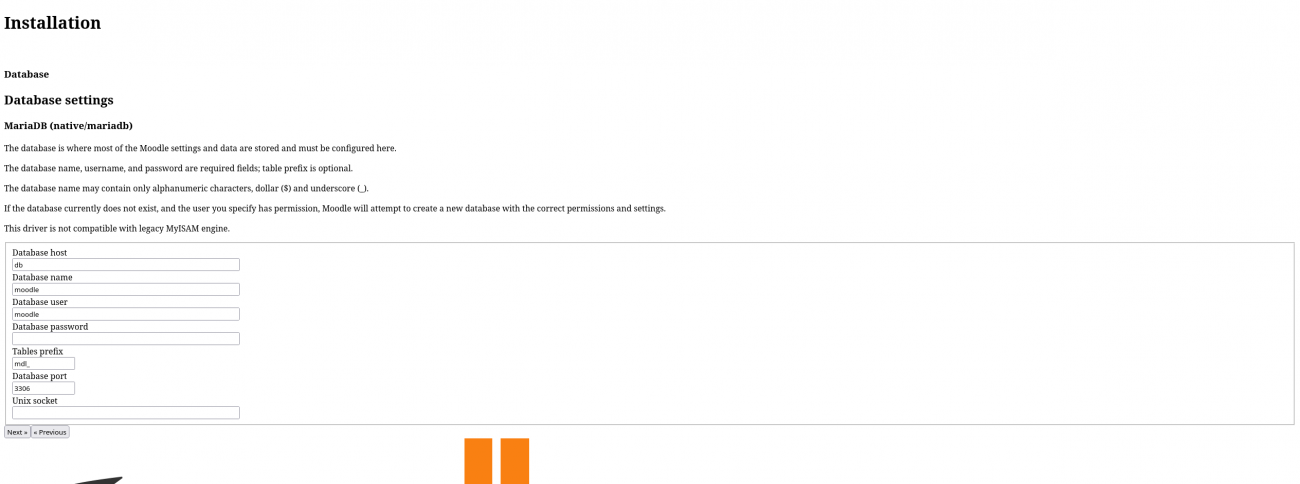
But first you'll need to proceed with the installation process - you'll be asked to select your language. And then you can click 'next' to continue. You'll be asked to specify your database (pick 'MariaDB' in this case) and then you'll be asked for the database details, as showing in the attached screenshot.
Your host will be db, your database name and user will both be moodle (case sensitive!) and you'll have to enter the database password you put into your docker-compose.yml file.
Then you should get a page showing you that your setup meets Moodle's requirement for installation (see attached screenshot), and finally you'll be asked to proceed with the install. Do so!
The installation will create the relevant database tables in the moodle database via the MariaDB container, and Moodle will create the aforementioned config.php file. The next thing to do is edit that file:
sudo nano /home/data/${FQDN}/src/config.php
where you'll tweak the configuration file so that the line
$CFG->wwwroot = 'http://moodletest.milll.ws';
looks like (note the shift from ''http'' to ''https''):
$CFG->wwwroot = 'https://moodletest.milll.ws';
And add this line above the final comment (the lines starting with '//')
$CFG->sslproxy=true;
which informs the Moodle system that it's sitting behind an SSL reverse proxy so it can adjust its behaviour accordingly.
So it should look something like this:
<?php // Moodle configuration fileunset($CFG);global $CFG;$CFG = new stdClass();$CFG->dbtype = 'mariadb';$CFG->dblibrary = 'native';$CFG->dbhost = 'db';$CFG->dbname = 'moodle';$CFG->dbuser = 'moodle';$CFG->dbpass = '[your super-secret db password]';$CFG->prefix = 'mdl_';$CFG->dboptions = array ( 'dbpersist' => 0, 'dbport' => 3306, 'dbsocket' => '', 'dbcollation' => 'utf8mb4_general_ci',);$CFG->wwwroot = 'https://moodletest.milll.ws';$CFG->dataroot = '/var/www/moodledata';$CFG->admin = 'admin';$CFG->directorypermissions = 0777;$CFG->sslproxy=true;require_once(__DIR__ . '/lib/setup.php');// There is no php closing tag in this file,// it is intentional because it prevents trailing whitespace problems!?>Save your updated config.php file, and return to the installation process - after the next button press, when the Moodle installer page loads, you should suddenly see the interface look all beautiful and tidy as the CSS suddenly loads.
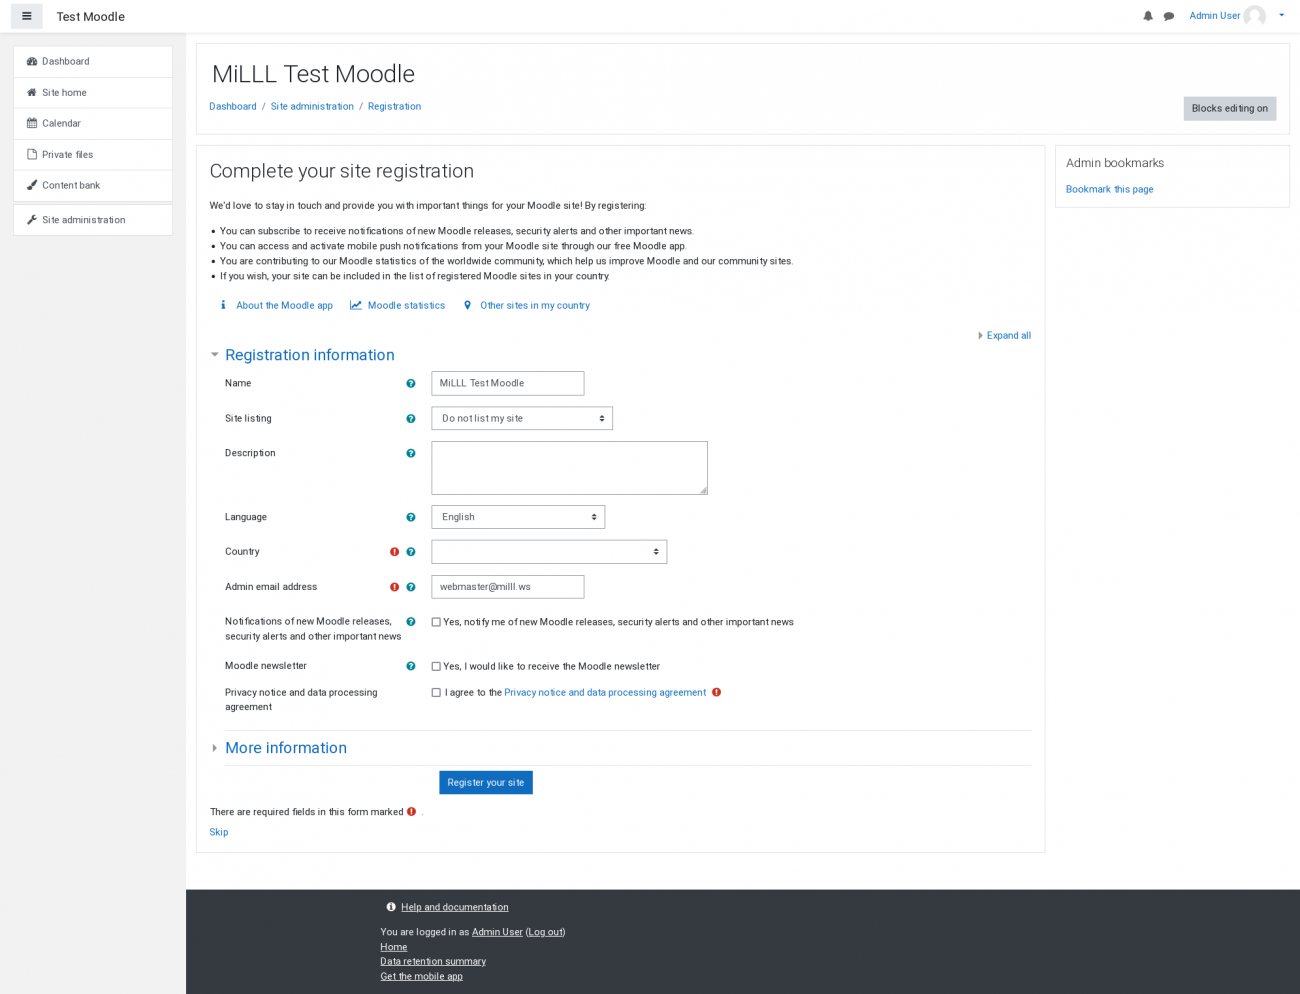
You'll be asked set some properties for your site, like giving it a name, and finally, you'll have to provide the details of an 'admin' user - I recommend creating a default admin user, 'admin', with a very strong password. You'll log in with that admin user (and provide the details to your organisation so that there's a bit of succession planning, if you're not available at some point) just this once, and immediately create a new user for ''yourself'' with your preferred details, which you'll then elevate to 'administrator' privileges, and then do all your administration of the site via your own user.
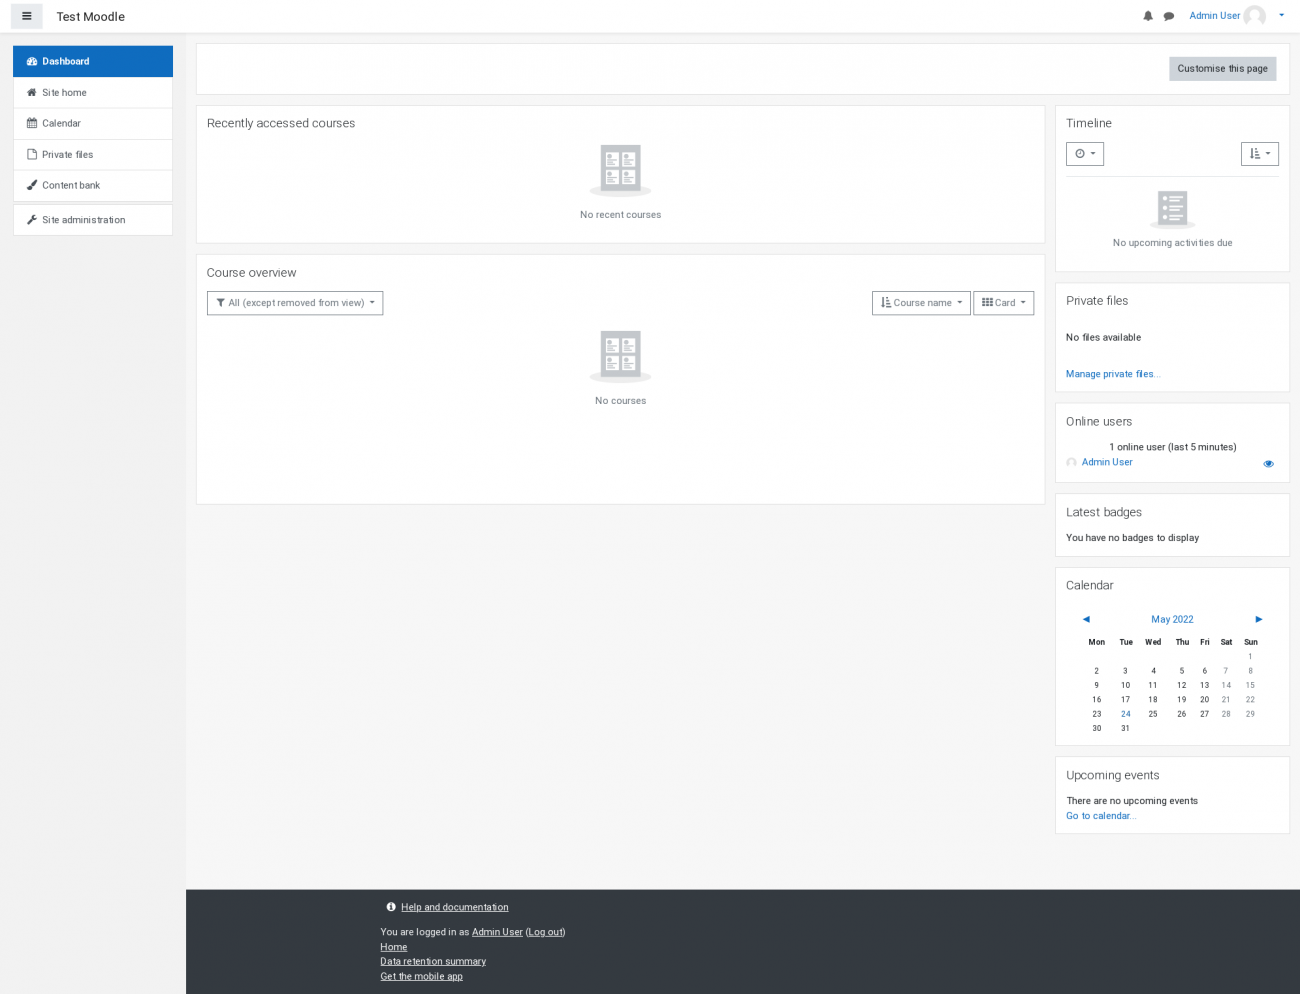
Once you've successfully completed defining an admin user, you'll end up at the admin 'dashboard', where you can create the personal administrator user for yourself. And then you can log out as 'admin' and log in as yourself... at which point, you're done! Moodle is installed. Hazzah!
Backing up your data
The way we run Docker Compose, all the files we want to preserve are stored on the VPS's own filesystem. The Docker containers only store 'volatile' data. That means we can literally remove the Docker containers at any time, and it won't (under normal circumstances) affect our precious data. The only time it ''might'' is when data, e.g. in the database, is held in system memory rather than being written to disk.
That means that making backups of our data can be achieve simply by copying files on the hard disk - and if we're really interested in preserving that data, we'll send it somewhere else - on a different computer, in a different geographic region, and ideally managed by a different company - to achieve suitable diversity.
MariaDB database dumps
The only element of our stack which isn't amenable to this file copying is the data managed by MariaDB. It is ''not'' generally safe to copy the files of a running database and to expect that restarting the database with those copied files will result in an uncorrupted data set. To safely backup a database, you either have to shut it down (which is disruptive and inelegant) or you have to get it do a database 'dump' while it's running (which it can usually do very quickly, without noticable impact on the performance of the database.
A database 'dump' is a frozen snapshot of the data in a generic form, usually SQL. It allows us to restore the database tables, the data they contain, and the relationships (indices, foreign keys, etc.) between the tables. It usually even lets us take data from an older version of MariaDB and import it into a newer version (which is very handy!).
So we need a method for periodically - and automatically - creating database dumps of our MariaDB Moodle database. Luckily, it's not too hard. I've created this script to do it.
Add new comment