Installing Mastodon with Docker-Compose on Ubuntu 16.04

Not long ago, Mastodon, an open source, federated alternative to the proprietary network-effect wunderkind, Twitter, came out of no where. Actually, it came out of an insane amount of work done by free and open source powerhouse Eugen Rochko aka Gargron and a small elite developer community, and many predecessors who are part of the GNU Social Fediverse (kudos to Danyl Strype for compiling that excellent history).
Mastodon, unlike Twitter, is entirely community driven - there are no ads, there are no privacy threats, there are no corporate Terms and Conditions to blindly "I Accept". And your Mastodon "persona" can be on a server you control (or that is controlled by someone you trust). Despite being distributed, you're still part of a global network, but one made resilient by its federated, decoupled nature.
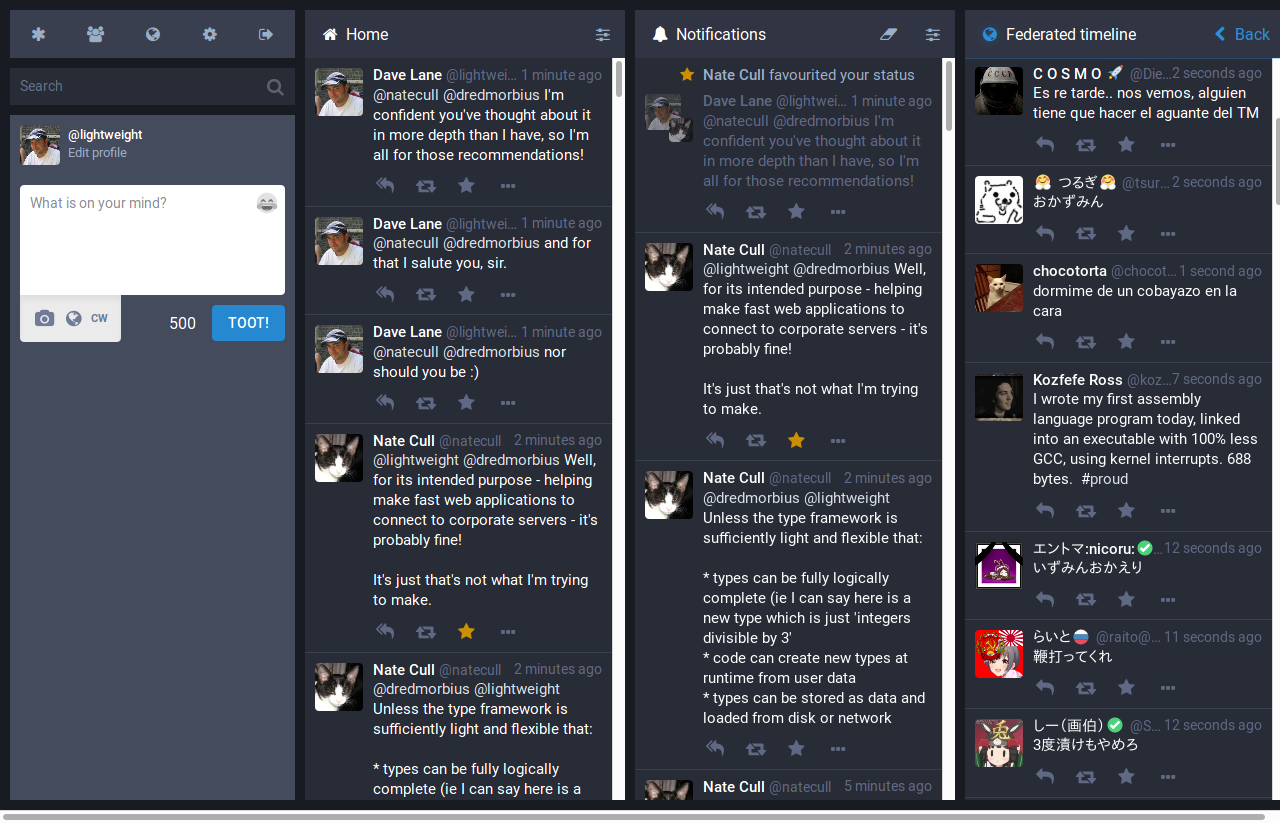
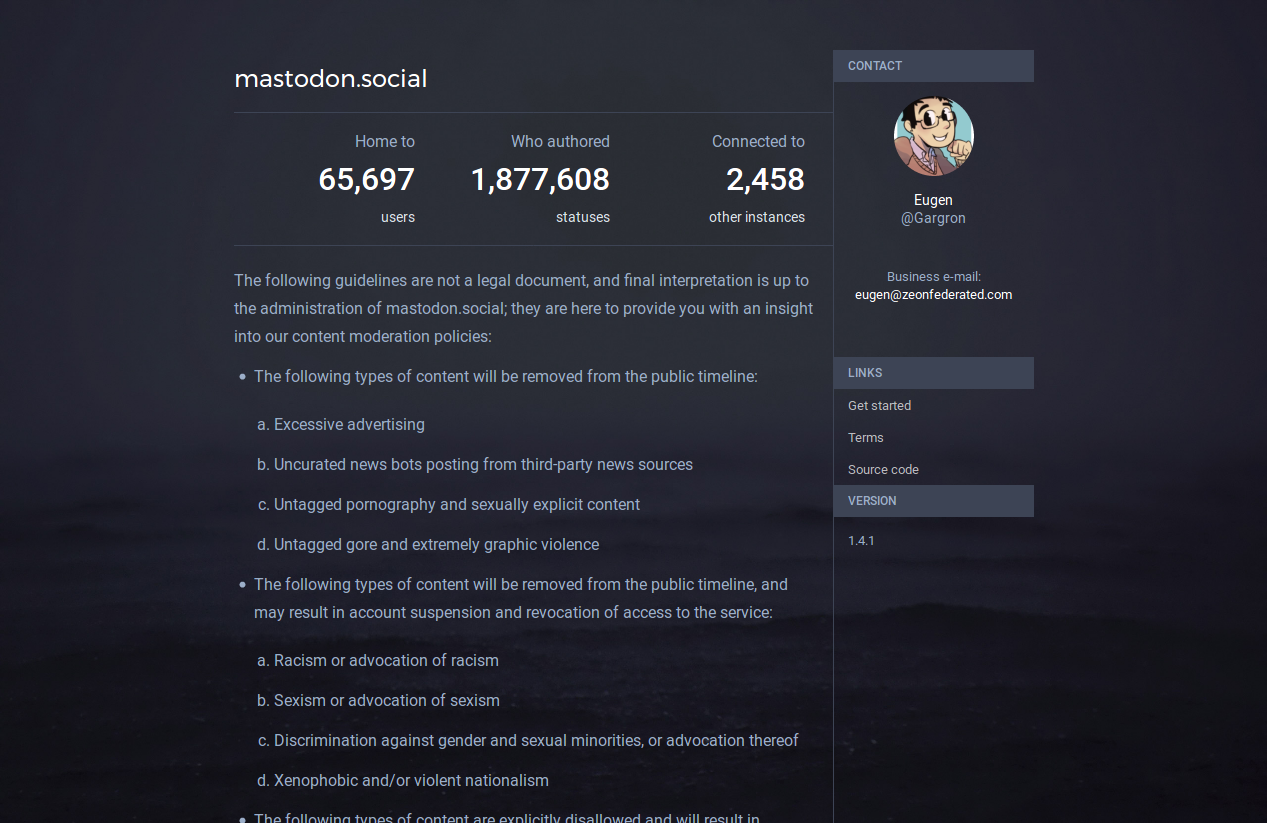
Instead of "Tweeting" in 140 characters like on Twitter, your "Toots" are limited to 500 characters (a lot more information can usefully be passed). You can follow people (and they you) by learning their handle - which looks like an email. I've got a couple Mastodon accounts, but my main one right now is lightweight@mastodon.social (I set it up quite a while back, before I set up my first couple Mastodon servers). Actually, Mastodon's biggest problem (in my opinion) right now is that you can't easily migrate your "main" persona from one server to another without losing a lot of its value (historical toots, followers, those you follow, etc.). You can migrate some things, like those you're following, and any users you've "blocked" but it's still fairly rudimentary.
Mastodon includes a nice web interface which will look somewhat familiar to anyone who's used Twitter's "Tweetdeck" web application. Similarly, the GNU Social community has rallied to provide at least 2 separate open source mobile apps (I run Tusky on my LineageOS powered phone at the moment) - I think there're some for iOS, too, although Apple's not as amenable to open source apps.
There's a useful Mastodon FAQ.
Running with the Mastodon Herd
The way I implement a complex Ruby on Rails app like Mastodon is to do as much as possible to keep it at arms length (and stop it from getting anything gooey on my virtual machine). To achieve that comforting isolation, I employ Docker Compose on Ubuntu Linux 16.04. See our Docker Compose article on how to install it (and its dependencies, like Docker itself).
Once you've got Docker Compose running, you can do what I did.
A couple notes:
- I have an unprivileged user on my server, "ubuntu". You can use any unprivileged users - I'd encourage you to use sudo rather than login as root.
- I use "vim" as my terminal-based text editor below. I think it's a great tool, but it does have a learning curve. If you're daunted (no shame in that), I recommend using "nano" instead - it'll probably installed on most Ubuntu 16.04 instances. If someone suggests you use "emacs" instead, they're jerkin' yer chain (I used emacs for over a decade, I know what I'm talking about).
- make sure you have the "git" VCS system installed...
sudo apt install gitshould do it. - you'll need nginx installed, too...
sudo apt install nginx-fullwill do that for you.
After logging into my server (via SSH remotely) as the ubuntu user (you might have different non-privileged user name, that's ok), I did the following (to avoid permissions problems later on, we'll create a "mastodon" group and user with the id 991, used by the Mastodon app by default, on the hosting platform):
groupadd -g 991 mastodon

useradd -u 991 -g 991 -c "Mastodon User" -s /usr/bin/nologin -d /home/data/mastodon mastodon
sudo mkdir -p /home/docker /home/data/mastodon

sudo chown -R ubuntu:ubuntu /home/docker

sudo chown -R mastodon:mastodon /home/data/mastodon
cd /home/docker

git clone https://github.com/tootsuite/mastodon.git docker-mastodon

cd docker-mastodon
What you then need to do is ensure you're using the current "tagged" release (it'll make your life easiest). You can find out what tags are available:
git tag -l
At present, the latest tag is "v1.4.7" - to use it do this:
git checkout tags/v1.4.7
Obviously, replace this with the most recent tag (note, you might have to look through the whole list to find it!). Then you're using the specific collection of files corresponding to the v1.4.7 tagged release. We can carry on...
cp .env.production.sample .env.production

vim .env.production
Edit this file to look like the .env.production sample below, but replacing the [tokens] with your values. Then run this:
vim docker-compose.yml
Edit this file to look like docker-compose.yml below.
docker-compose run --rm web rake secret
Run this last command 3 times - to get 3 secrets - long random strings - for .env.production! Copy and paste your 3 secrets into your .env.production file with your preferred editor as shown below.
docker-compose build

docker-compose up
That should download the required Docker images (might take quite a while depending on how fast your server's network connection is) and result in starting 5 different Docker containers, and you'll be able to watch them put out status (and error) messages as they boot and find their various dependencies. If there're no obvious errors, you can hit CTRL-C to shut them down again and restart them in a mode that keeps them running after you log out
docker-compose up -d
Note, you can always stop the containers by running docker-compose stop in that directory. You can check their status by running
docker ps
which should show you something like this:
CONTAINER ID        IMAGE                    COMMAND                  CREATED             STATUS              PORTS                                NAMES

c6be9f3eef1e        gargron/mastodon         "bundle exec rails s "   13 days ago         Up 13 days          127.0.0.1:3000->3000/tcp, 4000/tcp   dockermastodon_web_1

6a123d9b1843        gargron/mastodon         "bundle exec sidekiq "   13 days ago         Up 13 days          3000/tcp, 4000/tcp                   dockermastodon_sidekiq_1

f06c4a9bc479        gargron/mastodon         "npm run start"          13 days ago         Up 13 days          3000/tcp, 127.0.0.1:4000->4000/tcp   dockermastodon_streaming_1

6dbfad0669f8        postgres:alpine          "docker-entrypoint.sh"   2 weeks ago         Up 13 days          5432/tcp                             dockermastodon_postgres_1

8026b79e976d        redis:alpine             "docker-entrypoint.sh"   4 weeks ago         Up 13 days          6379/tcp                             dockermastodon_redis_1
You can use the 12 digit IDs to run other Docker commands, like docker inspect [ID] or docker exec -it [ID] bash to log into the container itself and get a bash prompt. After all that's running, you can do some final housekeeping:
docker-compose run --rm web rails db:migrate

docker-compose run --rm web rails assets:precompile

sudo vim /etc/nginx/sites-available/mastodon
Edit this to look like the mastodon nginx config file below.
sudo cd /etc/nginx/sites-enabled

sudo ln -sf ../sites-available/mastodon .
to enable the new configuration...
sudo nginx -t
To check for typos in you file. If you get no errors, you can restart nginx:
sudo service nginx restart
When that's done, to [your domain] in your browser, which should take you to https://[your domain] and create a new user. If your email is set up properly, you'll get an email confirmation, and this will allow you to log in. If that works, I'd encourage you to modify your configuration to use a Let's Encrypt SSL certificate to protect your users' (and your server's) security. We provide this dedicated howto! The .env.production template below assumes you've done this, so if your Mastodon isn't working, that might be why (you can try turning LOCAL_HTTPS=false temporarily if that's helpful).
You will want to create an admin user - create the user first through the web interface, and then on the command line run (replacing [admin username] with the username you set up:
cd /home/docker/docker-mastodon
docker-compose run --rm web rails mastodon:make_admin USERNAME=[admin username]
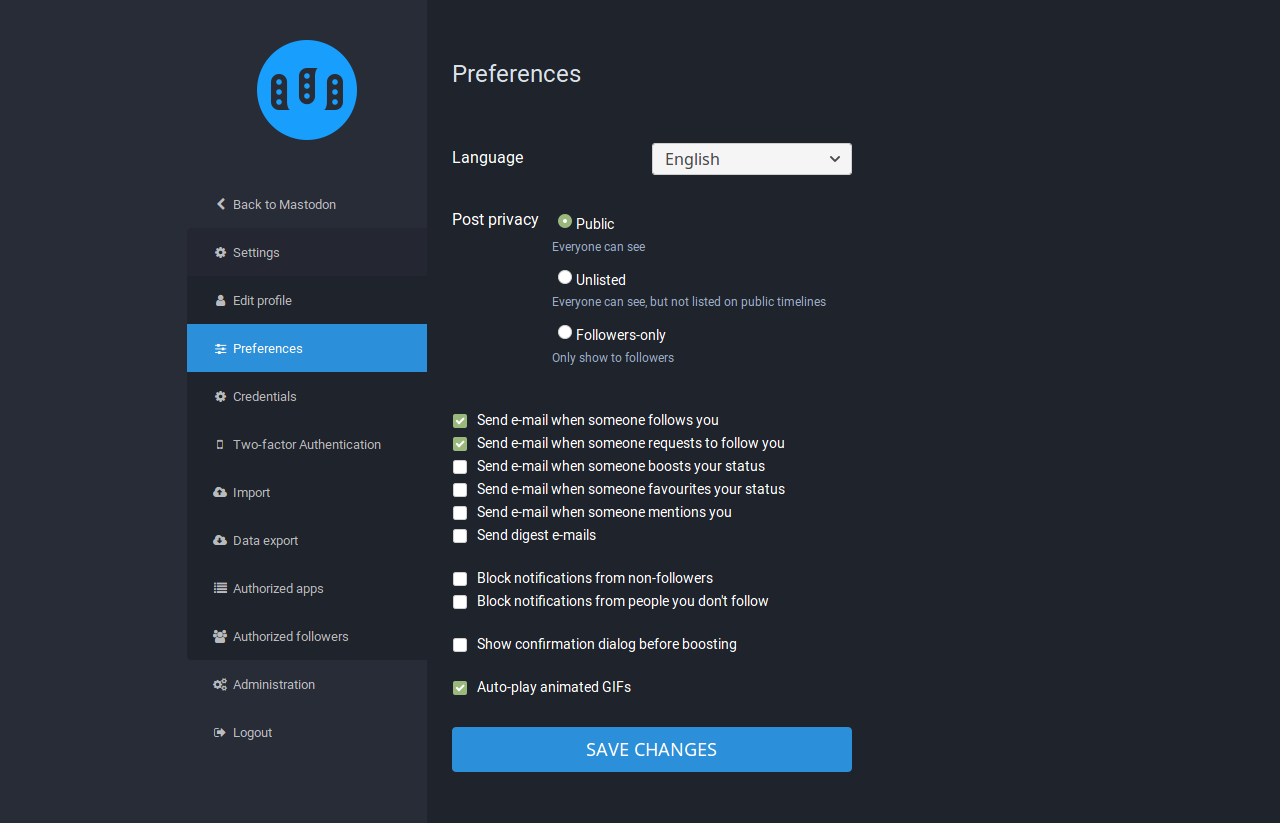
Then go to that user's Mastodon preferences and define the relevant info for your instance (see the administration options).
Debugging
If you run in to problems, a very useful Docker Compose option to use (from within the docker-mastodon directory) is
docker-compose logs -f
It will provide you with the automatically updating integrated logs of all the containers you've unleashed!
Sample .env.production
Here's a sample with (hopefully obviously named) [placeholders]
# Service dependencies

REDIS_HOST=redis

REDIS_PORT=6379

DB_HOST=postgres

DB_USER=postgres

DB_NAME=postgres

DB_PASS=

DB_PORT=5432
# Federation

LOCAL_DOMAIN=[your domain]

LOCAL_HTTPS=true
# Application secrets[third secret]
# Generate each with the `rake secret` task (`docker-compose run --rm web rake secret` if you use docker compose)
PAPERCLIP_SECRET=[first secret]
SECRET_KEY_BASE=[second secret]
OTP_SECRET=
# Registrations

# Single user mode will disable registrations and redirect frontpage to the first profile

# SINGLE_USER_MODE=true

# Prevent registrations with following e-mail domains

# EMAIL_DOMAIN_BLACKLIST=example1.com|example2.de|etc
# E-mail configuration

SMTP_SERVER=[smtp server domain name]

SMTP_PORT=587

SMTP_LOGIN=[smtp user name]

SMTP_PASSWORD=[smtp user password]

SMTP_FROM_ADDRESS=[sender address for outgoing mastodon emails]

SMTP_DOMAIN=[your site's base domain]

SMTP_OPENSSL_VERIFY_MODE=none
# Optional asset host for multi-server setups

# CDN_HOST=assets.example.com
# S3 (optional)

# S3_ENABLED=true

# S3_BUCKET=

# AWS_ACCESS_KEY_ID=

# AWS_SECRET_ACCESS_KEY=

# S3_REGION=

# S3_PROTOCOL=http

# S3_HOSTNAME=192.168.1.123:9000
# Optional alias for S3 if you want to use Cloudfront or Cloudflare in front

# S3_CLOUDFRONT_HOST=
# Streaming API integration

# STREAMING_API_BASE_URL=
Sample docker-compose.yml
Here's a sample with [placeholders]. Note - this generates five Docker containers. Yeah, like I said, this is a serious, complex app.
version: '2'

services:

  postgres:

    restart: unless-stopped

    image: postgres:alpine

    volumes:

     - /home/data/mastodon/postgres:/var/lib/postgresql/data

  redis:

    restart: unless-stopped

    image: redis:alpine

    volumes:

     - /home/data/mastodon/redis:/data

  web:

    restart: unless-stopped

    build: .

    image: gargron/mastodon

    env_file: .env.production

    command: bundle exec rails s -p 3000 -b '0.0.0.0'

    ports:

      - "127.0.0.1:3000:3000"

    depends_on:

      - postgres

      - redis

    volumes:

      - /home/data/mastodon/packs:/mastodon/public/packs
- /home/data/mastodon/assets:/mastodon/public/assets
      - /home/data/mastodon/system:/mastodon/public/system

  streaming:

    restart: unless-stopped

    build: .

    image: gargron/mastodon

    env_file: .env.production

    command: npm run start

    ports:

      - "127.0.0.1:4000:4000"

    depends_on:

      - postgres

      - redis

  sidekiq:

    restart: unless-stopped

    build: .

    image: gargron/mastodon

    env_file: .env.production

    command: bundle exec sidekiq -q default -q mailers -q pull -q push

    depends_on:

      - postgres

      - redis

    volumes:

      - /home/data/mastodon/system:/mastodon/public/system
Sample nginx mastodon config file
Here's a copy of the nginx configuration file I use (with [placeholders], obviously) - it's the result of quite a lot of tweaking. Have fun!
map $http_upgrade $connection_upgrade {

    default upgrade;

    ''      close;

}
server {

    listen 80;

#    listen [::]:80;

    server_name [your domain];

    root /var/www/html;
    # for let's encrypt renewals!

    location /.well-known/acme-challenge/ {

        default_type text/plain;

        root /var/www/html;

   }
    # redirect all HTTP traffic to HTTPS.

    location / {

        return 302 https://[your domain]$request_uri;

    }

}
server {

    listen 443 ssl;

#    listen [::]:443 ssl;

    server_name [your domain];
    ssl_certificate /etc/letsencrypt/live/[your domain]/fullchain.pem;

    ssl_certificate_key /etc/letsencrypt/live/[your domain]/privkey.pem;

    ssl_protocols TLSv1 TLSv1.1 TLSv1.2;

    # from https://0x39b.fr/post/nginx_security/

    ssl_session_timeout 1d;

    ssl_session_cache shared:SSL:50m;

    #ssl_session_tickets off;

    ssl_prefer_server_ciphers on;

    ssl_ciphers 'ECDHE-ECDSA-AES256-GCM-SHA384:ECDHE-RSA-AES256-GCM-SHA384:ECDHE-ECDSA-CHACHA20-POLY1305:ECDHE-RSA-CHACHA20-POLY1305:ECDHE-ECDSA-AES128-GCM-SHA256:ECDHE-RSA-AES128-GCM-SHA256:ECDHE-ECDSA-AES256-SHA384:ECDHE-RSA-AES256-SHA384:ECDHE-ECDSA-AES128-SHA256:ECDHE-RSA-AES128-SHA256';

    # OCSP Stapling ---

    # fetch OCSP records from URL in ssl_certificate and cache them

    ssl_stapling on;

    ssl_stapling_verify on;

    # to create this, see https://raymii.org/s/tutorials/Strong_SSL_Security_On_nginx.html

    ssl_dhparam /etc/ssl/certs/dhparam.pem;
    # for let's encrypt renewals!

    location /.well-known/acme-challenge/ {

        default_type text/plain;

        root /var/www/html;

    }
    keepalive_timeout    70;

    sendfile             on;

    client_max_body_size 0;
# update from https://github.com/tootsuite/documentation/blob/master/Running-Mastodon/Production-guide.md

    gzip on;

    gzip_vary on;

    gzip_proxied any;

    gzip_comp_level 6;

    gzip_buffers 16 8k;

    gzip_http_version 1.1;

    gzip_types text/plain text/css application/json application/javascript text/xml application/xml application/xml+rss text/javascript;
add_header Strict-Transport-Security "max-age=31536000; includeSubDomains";
    location / {

        try_files $uri @proxy;

    }
    location ~ ^/(packs|system/media_attachments/files|system/accounts/avatars) {

        add_header Cache-Control "public, max-age=31536000, immutable";

        try_files $uri @proxy;

    }
    location @proxy {

        proxy_set_header Host $host;

        proxy_set_header X-Real-IP $remote_addr;

        proxy_set_header X-Forwarded-For $proxy_add_x_forwarded_for;

        proxy_set_header X-Forwarded-Proto https;
proxy_set_header Proxy "";
        proxy_pass_header Server;

        proxy_pass http://localhost:3000;

        proxy_buffering off;

        proxy_redirect off;

        proxy_http_version 1.1;

        proxy_set_header Upgrade $http_upgrade;

        proxy_set_header Connection $connection_upgrade;

        tcp_nodelay on;

    }
    location /api/v1/streaming {

        proxy_set_header Host $host;

        proxy_set_header X-Real-IP $remote_addr;

        proxy_set_header X-Forwarded-For $proxy_add_x_forwarded_for;

        proxy_set_header X-Forwarded-Proto https;

        proxy_set_header Proxy "";

        proxy_pass http://localhost:4000;

        proxy_buffering off;

        proxy_redirect off;

        proxy_http_version 1.1;

        proxy_set_header Upgrade $http_upgrade;

        proxy_set_header Connection $connection_upgrade;

        tcp_nodelay on;

    }
    error_page 500 501 502 503 504 /500.html;

    # this should give you an A+ rating on https://instances.mastodon.xyz/

    add_header X-XSS-Protection "1; mode=block";

    add_header Content-Security-Policy "default-src 'none'; font-src 'self'; media-src 'self'; style-src 'self' 'unsafe-inline'; script-src 'self'; img-src 'self' data: blob:; connect-src 'self' wss://[your domain]";

}
Enjoy!
Keeping Mastodon up to date
To ensure your Mastodon doesn't become a run down abandoned trailerpark node bit rotting quietly in the ether, I recommend you keep it up to date! There is a useful Mastodon Administrator's guide for Docker instances that I consult every time I want to update. Note, if the "git stash" part of it is too hard, I recommend that any time you change your docker-compose.yml file, you copy it to
cp docker-compose.yml docker-compose.yml-backup
That way, you can simply remove docker-compose.yml (double check your docker-compose.yml-backup is up-to-date first!), do the git checkout TAG_NAME, and then
cp docker-compose.yml-backup docker-compose.yml
and you're done. Welcome the Fediverse!
Add new comment