Installing NextCloud and Collabora Office Online with Docker on Ubuntu 16.04
Update 2021-11-08: this post is now getting a bit long-in-the-tooth, and I need to update it to use up-to-date components. It might still be useful to folks, but use it with caution. Also, please note, we're using NextCloud with OnlyOffice (the open source community edition) these days. Update 2023-06-14: Here's a new tutorial for Ubuntu 22.04!
Dropbox is the best known of the end-user "cloud storage" services for documents, backups, and synchronising data among multiple devices, although now Google's Drive and Microsoft's OneDrive are functionally similar and are being heavily promoted and tied into all sorts of services.
Similarly the collaborative editing of documents, spreadsheets, and presentations in the browser, pioneered by Etherpad, but then adopted in a big way by Google Docs (and more recently, Microsoft Office 365), has revolutionised collective note taking, document preparation, and ease of access to these powerful tools by the mainstream of computer users. Only a browser is required, and no other software needs to be installed.
But what about people who don't want to entrust all of their data to foreign corporations, holding their data in foreign jurisdiction, in formats that may or may not be retrievable in the event that the supplier fails or changes "strategic direction"? And many of these services involve "mining" their data to extract useful information that vendors sell to others to help them advertise to us in a more targeted way. Yeah, that's creepy.
More-over, often if you want to share your data with others, they have to log into the same service, and accept the service's terms and conditions (usually substantially constraining the user's normal rights and freedoms, although who actually reads those, eh?!) in order to do so... so ones use of those services has a magnifying effect on the loss of privacy and control.
Some people sensibly prefer to manage their own, or institution-specific, solutions on the infrastructure of their choosing, in a way that doesn't tie anyone into paying ever increasing amounts for data storage as the volumes increase perpetually, month on month.
Some of us simply prefer to have control of our own destiny, without a dependence on, for example, file or data storage formats and practices that are completely opaque to them. Our data reflects our creativity energy, and it seems much more comfortable for many of us to be in charge of our own fates rather than entrusting it to a third party who simply sees us a profit centre.
Thankfully, the open source world has created an array of possible equivalent systems, and this post describes how you, too, can set up your own equivalent to Dropbox + Google Docs using entirely open source software on any commodity virtual machine hosting system you want to use by adopting NextCloud and Collabora Office.
NextCloud
NextCloud is functionally similar to Dropbox, however, with its active development community and plug-in architecture, it can provide quite a lot more as well, like shared calendaring, email, video conferencing, contact syncing, image/sound/video galleries, among many other services.
If you prefer not to organise and run your own server, you can purchase a supported server via their website for a cost similar to Dropbox (although, realise that NextCloud is relatively small by comparison and doesn't have the massive economies of scale enjoyed by the bigger players).
For those with an interest in history: NextCloud is a fork created by the founder of OwnCloud, after he decided that the company which formed around his OwnCloud project was moving in a direction that was philosophical unpalatable for him. The beauty of open source is that developers can follow their consciences without requiring anyone's permission. The resulting "forks" in code bases and communities then thrive or die based on the strengths of the communities they can build and sustain. This fork is remarkably similar to that which occurred in the OpenOffice community which resulted in the founding of LibreOffice. LibreOffice has thrived and OpenOffice has faded into irrelevance. More on that below.
For those with a technological interest, NextCloud is a mature PHP application (but with a modern architecture, including a command line interface, occ) which stores its data in an RDBMS like MySQL, MariaDB, PostgreSQL, or (usually for development purposes) the lightweight SQLite database. Here are details for would-be administrators.
Collabora Office
Given how much companies like Google and Microsoft invest on Docs and Office 365 respectively, how is it possible for an open source community to create a credible competitor? Turns out it's not as hard as you might think if they leverage the power of open source.
A small software company with headquarters in the UK (although their team appears to be from all over), Collabora Office, has taken on the ambitious mission of creating a "collaborative web interface" allowing users to collaborate using LibreOffice, one of the most powerful and widely used office package available anywhere. We're currently at Collabora Office 3.0, and the front end is quite nice and functional, but still pretty simple - that can be a good thing for many users. Collabora is progressively re-imagining the user interface of LibreOffice as a collaborative web interface. This isn't easy, but it's much easier than it otherwise would be because the difficult job of creating the heavy-lifting application back-end is already done - LibreOffice is a mature widely used application (albeit with a desktop interface, not a web-based collaborative interface). So we can expect progress will be rapid, and large sets of new capabilities will be "unlocked" as they progress their efforts.
NextCloud and Collabora - better together!
The beauty of the open source software model is that we can connect NextCloud and Collabora office - completely separate and unrelated communities - thanks to a new integration standard, WOPI (Web-application Open Platform Interface) they form a well integrated component model - with the major added benefit of being able to swap in a better file management platform, or a better collaborative productivity package if one or the other emerges, without having to start from scratch.
Setting up your own NextCloud Collabora Server
If you're game to run your own (and, in my experience, it's a surprisingly well behaved system) here's how you do it.
In preparation, you'll want to have the following ready:
- a Linux virtual machine or "VM" (I recommend running the current Ubuntu LTS version, or current Debian) with a user with Sudo privileges...,
- your domain name for the NextCloud instance, pointing to the IP address of your VM,
- your domain name for the Collabora instance, also pointing to the IP of your VM, and
- credentials for an email address capable of sending from a remote server (usually termed an "authenticating SMTP email account")
Secure access with SSH
First things first, make sure you're logged into your host (probably via SSH) as a user who has "sudo" capabilities! You need to log into the host from your local machine. We recommend setting up key-based authentication.
Firewall with UFW
No computer system is ever full secure - there're always exploits waiting to be found, so security is a process of maintaining vigilance. Part of that is reducing exposure - minimising your "attack surface". Use a firewall - "ufw" is installed on Ubuntu by default. Make sure you've got exceptions for SSH (without them, you could lock yourself out of your machine! Doh!).
Run the following commands to allow your Docker containers to talk to other services on your host.
sudo ufw allow in on docker0

sudo ufw allow from 172.0.0.0/8 to any
Specifically for Docker's benefit, you need to tweak the default Forwarding rule (I use "vim" as my editor. If you don't know how to/want to use it, replace vim with nano everywhere you see it in the following - nano's easier to use for simple edits like this):
sudo vim /etc/default/ufw
and copy the line DEFAULT_FORWARD_POLICY="DROP" tweak it to look like this (commenting out the default, but leaving it there for future reference!):
#DEFAULT_FORWARD_POLICY="DROP"

DEFAULT_FORWARD_POLICY="ACCEPT"
You also have to edit /etc/ufw/sysctl.conf and remove the "#" at the start of the following lines, so they look like this:
sudo vim /etc/ufw/sysctl.conf
# Uncomment this to allow this host to route packets between interfaces

net/ipv4/ip_forward=1

net/ipv6/conf/default/forwarding=1

net/ipv6/conf/all/forwarding=1
and finally restart the network stack and ufw on your server
sudo service networking restart

sudo service ufw restart
Installing the Nginx webserver
In the configuration I'm describing here, you'll need a webserver running on the server - it'll be acting as a "proxy" for the Docker-based Nginx instance described below. I like the efficiency of Nginx and clarity of Nginx configurations over those of Apache and other open source web servers. Here's how you install it.
sudo apt-get install nginx-full
To allow nginx to be visible via ports 80 and 443, run
sudo ufw allow "Nginx Full"
Note: make sure your hosting service is not blocking these ports at some outer layer (depending on who's providing that hosting service you may have to set up port forwarding).
Installing MariaDB
MariaDB is effectively a drop-in alternative to MySQL and we prefer it because it's not controlled by Oracle and has a more active developer community. On Ubuntu, MariaDB pretends to be MySQL for compatibility purposes, so don't be weirded out by the interchangeable names below. Install the server and the client like this.
sudo apt-get install mariadb-server-10.0 mariadb-client-10.0
You need to set a root (admin) user password - you might want to create a /root/.my.cnf file containing the following (replacing YOURPASSWORD) to let you access MariaDB without a password from the commandline:
[client]

user=root

password=YOURPASSWORD
You should now be able to type "mysql" at the command prompt
Tweak the configuration so that it's listening on
sudo vim /etc/mysql/mariadb.conf.d/50-server.cnf
and copy the bind-address line and adjust so it looks like this - we want MariaDB to be listening on all interfaces, not just localhost (127.0.0.1)...
# Instead of skip-networking the default is now to listen only on

# localhost which is more compatible and is not less secure.

#bind-address           = 127.0.0.1

bind-address            = 0.0.0.0
Then restart MariaDB:
sudo service mysql restart
It should now be listening on port 3306 on all interfaces, i.e. 0.0.0.0.
Now set up the database which will hold NextCloud's data. Log into the MySQL client on the host (if you've created a .my.cnf file in your home directory as describe above, you won't need to enter your username and password):
mysql -u root -p
Enter your root password when prompted. It's also a good idea to gin up a password for your "nextcloud" database user. I usually use pwgen (sudo apt-get install pwgen) - for example running this command will give you a single 12 character password without special characters (just numbers and letters):
pwgen -s 12 1

T7KR2osrMkyC
At the prompt (which will look something like MariaDB [(none)]>) enter the following lines (putting your password in place of [passwd]):
CREATE DATABASE nextcloud CHARACTER SET utf8mb4 COLLATE utf8mb4_unicode_ci;

CREATE USER "nextcloud"@"%" IDENTIFIED BY "[passwd]";

GRANT ALL ON nextcloud.* to "nextcloud"@"%";

FLUSH PRIVILEGES;
Then enter \q to exit.
NextCloud and Collabora Office with Docker
We make use of the NextCloud community's stable Docker container which they keep up to date. Similarly, the Collabora community has created a reference Docker container.
The over all architecture consists of five Docker containers (note, done properly, you aim to ensure that each container runs only one service!):
- the main NextCloud container (running the PHP-FPM service)
- an identical container to the PHP one which runs the cron service (which does periodic administrative tasks relevant to NextCloud)
- the self-contained Collabora Office container (running PHP with an Apache web server instance and a full instance of LibreOffice running in headless server mode (never fear, no servers were harmed in the building of this server!) - yes this server doesn't really adhere to the "one-service per container" convention, but I'm ok with that. It's just a convention after all.)
- a Redis container (which provides performance improving caching for NextCloud), and
- an Nginx webserver container which makes it easier to manage the configuration and paths of the NextCloud and Collabora servers via WOPI. It means that on the hosting server, we only need to run a proxying web server, which is easy.
The way I prefer to implement this set of containers is to use Docker Compose (after first setting up Docker support on your server - I'll assume you've followed the complete instructions including setting up Docker for your non-root user). I suggest using the latest installation instructions provided by the Docker community. To be honest, I usually use the alternative instructions, employing the "pip" approach. You can upgrade an existing install by issuing (on your Linux VM's command line):
sudo pip install -U docker-compose
To set up your server, I recommend setting up a place for your Docker containers (replace "me" with your non-root username on the server) and the associated persistent data (your Docker containers should hold no important data - you should be able to delete and recreate them entirely without losing any important data or configuration):
sudo mkdir /home/data
sudo mkdir /home/data/nextcloud
sudo mkdir /home/data/nextcloud/apps

sudo mkdir /home/data/nextcloud/config

sudo mkdir /home/data/nextcloud/data

sudo mkdir /home/data/nextcloud/redis

sudo mkdir /home/data/nextcloud/resources

sudo mkdir /home/docker

sudo mkdir /home/docker/nextcloud-collabora

sudo chown -R me:me /home/docker

cd /home/docker/nextcloud-collabora
Here's an example of the required docker-compose.yml file (you can create this via a text editor like "nano" which should be pre-installed on any VM these days, or use my preferred, but less intuitive, editor, vim via vim docker-compose.yml in the /home/docker/nextcloud-collabora directory):
version: '2'

networks:

  back:

    driver: bridge

services:

  web:

    image: nginx

    ports:

      - 127.0.0.1:8082:80

    volumes:

      - ./nginx.conf:/etc/nginx/nginx.conf:ro

    links:

      - app

    volumes_from:

      - app

    environment:

      - VIRTUAL_HOST

    networks:

    - back

    restart: unless-stopped

  app:

    image: nextcloud:12-fpm

    links:

      - redis

    volumes:

      - /home/data/nextcloud/apps:/var/www/html/apps

      - /home/data/nextcloud/config:/var/www/html/config

      - /home/data/nextcloud/resources:/var/www/html/resources

      - /home/data/nextcloud/data:/var/www/html/data

    networks:

    - back

    restart: unless-stopped

  cron:

    image: nextcloud:12-fpm

    volumes_from:

      - app

    user: www-data

    entrypoint: |

      bash -c 'bash -s <<EOF

      trap "break;exit" SIGHUP SIGINT SIGTERM

      while /bin/true; do

        /usr/local/bin/php /var/www/html/cron.php

        sleep 900

      done

      EOF'

    networks:

      - back

    restart: unless-stopped

  redis:

    image: redis:alpine

    volumes:

      - /home/data/nextcloud/redis:/data

    networks:

      - back

    restart: unless-stopped

  collab:

    image: collabora/code

    environment:
      # put the domain name you select for your NextCloud instance

      # here! Escape any . in your domain name by preceding them with \\

      domain: your\\.domain\\.tld

      username: admin
      # put your own strong password in here!

      password: some-good-password

    cap_add:

      - MKNOD

    networks:

      - back

    volumes_from:

      - app

    ports:

      - 127.0.0.1:9980:9980

    links:

      - app

    restart: unless-stopped
You'll need to substitute the domain name you pick for your NextCloud instance - Collabora's container requires that you specify it so that it doesn't accept connections from other (potentially nefarious) containers elsewhere on the Internet!
Also note, the "ports" specified above, 8082 for nginx and 9980 for collab are arbitrary - I picked these to ensure they don't conflict with ports being used by other containers on my server - you can use these if you want, or use sudo netstat -punta to see what ports are currently claimed by other services on your server (if there are any) and pick ones that don't clash! If it scroll past too fast, you can pipe it into less to allow you to scroll and search: sudo netstat -punta | less - hit "q" to exit or "/" to initiate a text search.
You will also need to provide the "nginx.conf" file referenced in the nginx section of the file. Do that by using your editor, e.g. vim nginx.conf, and enter this content:
user www-data;
events {

  worker_connections 768;

}
http {

  upstream backend {
      # if you don't call your NextCloud server "app" in your

      # docker-compose.yml, you'll need to change app below to
      # whatever you end up calling it.

      server app:9000;

  }

  include /etc/nginx/mime.types;

  default_type application/octet-stream;
  server {

    listen 80;


    # Add headers to serve security related headers

    add_header X-Content-Type-Options nosniff;

    add_header X-Frame-Options "SAMEORIGIN";

    add_header X-XSS-Protection "1; mode=block";

    add_header X-Robots-Tag none;

    add_header X-Download-Options noopen;

    add_header X-Permitted-Cross-Domain-Policies none;
root /var/www/html;
    location = /robots.txt {

      allow all;

      log_not_found off;

      access_log off;

    }
    location = /.well-known/carddav {

      return 301 $scheme://$host/remote.php/dav;

    }

    location = /.well-known/caldav {

      return 301 $scheme://$host/remote.php/dav;

    }
    client_max_body_size 1G;

    fastcgi_buffers 64 4K;
gzip off;
    index index.php;

    error_page 403 /core/templates/403.php;

    error_page 404 /core/templates/404.php;


    location / {

        rewrite ^ /index.php$uri;

    }
    location ~ ^/(?:build|tests|config|lib|3rdparty|templates|data)/ {

        deny all;

    }

    location ~ ^/(?:\.|autotest|occ|issue|indie|db_|console) {

        deny all;

    }
    location ~ ^/(?:index|remote|public|cron|core/ajax/update|status|ocs/v[12]|updater/.+|ocs-provider/.+|core/templates/40[34])\.php(?:$|/) {

        include fastcgi_params;

        fastcgi_split_path_info ^(.+\.php)(/.*)$;

        fastcgi_param SCRIPT_FILENAME $document_root$fastcgi_script_name;

        fastcgi_param PATH_INFO $fastcgi_path_info;

        fastcgi_param HTTPS on;

        #Avoid sending the security headers twice

        fastcgi_param modHeadersAvailable true;

        fastcgi_param front_controller_active true;

        fastcgi_pass backend;

        fastcgi_intercept_errors on;

        fastcgi_request_buffering off;

    }
    location ~ ^/(?:updater|ocs-provider)(?:$|/) {

        try_files $uri/ =404;

        index index.php;

    }
    # Adding the cache control header for js and css files

    # Make sure it is BELOW the PHP block

    location ~* \.(?:css|js)$ {

        try_files $uri /index.php$uri$is_args$args;

        add_header Cache-Control "public, max-age=7200";

        # Add headers to serve security related headers (It is intended to

        # have those duplicated to the ones above)

        # Before enabling Strict-Transport-Security headers please read into

        # this topic first.

        # add_header Strict-Transport-Security "max-age=15768000;

        #  includeSubDomains; preload;";

        add_header X-Content-Type-Options nosniff;

        add_header X-Frame-Options "SAMEORIGIN";

        add_header X-XSS-Protection "1; mode=block";

        add_header X-Robots-Tag none;

        add_header X-Download-Options noopen;

        add_header X-Permitted-Cross-Domain-Policies none;

        # Optional: Don't log access to assets

        access_log off;

    }
    location ~* \.(?:svg|gif|png|html|ttf|woff|ico|jpg|jpeg)$ {

        try_files $uri /index.php$uri$is_args$args;

        # Optional: Don't log access to other assets

        access_log off;

    }

  }

}
That should be all the configuration you need to make the Docker containers go.
Configuring Nginx to proxy NextCloud and Collabora
The next step is configuring the local nginx proxy servers for NextCloud and Collabora using the nginx instance you installed earlier. That's what responds to the domain name you choose for this service. In our case, the name is https://docs.oeru.org - you can have a look at it to see what you should be seeing when you first start things up! We use Let's Encrypt to provide secure hosting - here're my Let's Encrypt instructions on setting it up. The key thing to realise is that your "certificates" need to exist for Nginx to restart with the new configurations below - use the "commenting out the intervening lines" trick mentioned in my instructions to bootstrap the creation of your secure certificates!
To configure the proxies, you need to create two configuration files in your /etc/nginx/sites-available/ directory.
NextCloud Proxy Configuration
Create a file with a meaningful name for your NextCloud Proxy, perhaps based on the domain name you've chosen (our file for docs.oeru.org is called "docs") using the same editing approach as the last few (although this is in a different directory) for example sudo vim /etc/nginx/sites-available/docs with the following contents, replacing "nextcloud.domain" with your selected domain name (and the port number 8082 if you've opted to change to a different one!):
server {

    listen 80;

    server_name nextcloud.domain;
include /etc/nginx/includes/letsencrypt.conf;
    # redirect all HTTP traffic to HTTPS.

    location / {

        return  302 https://nextcloud.domain$request_uri;

    }

}
# This configuration assumes that there's an nginx container talking to the mautic PHP-fpm container,

# and this is a reverse proxy for that Mautic instance.

server {

    listen 443 ssl;

    server_name nextcloud.domain;
    ssl_certificate /etc/letsencrypt/live/nextcloud.domain/fullchain.pem;

    ssl_certificate_key /etc/letsencrypt/live/nextcloud.domain/privkey.pem;

    ssl_protocols TLSv1 TLSv1.1 TLSv1.2;

    # to create this, see https://raymii.org/s/tutorials/Strong_SSL_Security_On_nginx.html

    ssl_dhparam /etc/ssl/certs/dhparam.pem;

    keepalive_timeout 20s;
    include /etc/nginx/includes/letsencrypt.conf;


    location ^~ / {

        proxy_pass http://localhost:8082;

        proxy_set_header Upgrade $http_upgrade;

        proxy_set_header Connection "Upgrade";

        proxy_set_header Host $http_host;

        proxy_read_timeout 36000s;

    }

    client_max_body_size 1G;

    fastcgi_buffers 64 4K;
    add_header X-Frame-Options "SAMEORIGIN";

    add_header Strict-Transport-Security "max-age=31536000; includeSubdomains;";

}
Collab Proxy Configuration
Now create a collabora proxy configuration.
Note: This will probably never by used by any user directly (there is a resource analysis service on the collabora system that might be of interest) - instead it'll be referenced by the NextCloud instance transparently to your users.
In our case, we chose the domain collab.oeru.org and the file is called "collab", created via sudo vim /etc/nginx/sites-available/collab and containing (replace collab.domain with the one you've selected - similarly replace the port number 9980 with whatever you've selected if you've opted for a different one!):
server {

    listen 80;

    server_name collab.domain;
    # for let's encrypt renewals!

    include /etc/nginx/includes/letsencrypt.conf;
    # redirect all HTTP traffic to HTTPS.

    location / {

        return  302 https://collab.domain$request_uri;

    }

}
server {

    listen 443 ssl;

    server_name collab.domain;
    ssl_certificate /etc/letsencrypt/live/collab.domain/fullchain.pem;

    ssl_certificate_key /etc/letsencrypt/live/collab.domain/privkey.pem;

    ssl_protocols TLSv1 TLSv1.1 TLSv1.2;

    # to create this, see https://raymii.org/s/tutorials/Strong_SSL_Security_On_nginx.html

    ssl_dhparam /etc/ssl/certs/dhparam.pem;

    keepalive_timeout 20s;
    # for let's encrypt renewals!

    include /etc/nginx/includes/letsencrypt.conf;
    proxy_http_version 1.1;

    proxy_buffering off;
    # static files

    location ^~ /loleaflet {

        proxy_pass https://localhost:9980;

        proxy_set_header Host $http_host;

    }
    # WOPI discovery URL

    location ^~ /hosting/discovery {

        proxy_pass https://localhost:9980;

        proxy_set_header Host $http_host;

    }
    # download, presentation and image upload

    location ^~ /lool {

        proxy_pass https://localhost:9980;

        proxy_set_header Upgrade $http_upgrade;

        proxy_set_header Conection "upgrade";

        proxy_set_header Host $http_host;

    }

}
Once those are created, you have to make sure that they're "enabled" (replacing with your file names, of course):
sudo cd /etc/nginx/sites-enabled

sudo ln -sf ../sites-available/docs .

sudo ln -sf ../sites-available/collab .
To confirm that there aren't any typos or issues that might make nginx unhappy, run
sudo nginx -t
If all's well, get nginx to reread its configuration with the new files:
sudo service nginx reload
Firing it all up!
Phew - congratulations on getting here! We've reached the moment of truth where we need to see if this whole thing will work!
We need to make sure we're back in the Docker directory we set up:
cd /home/docker/nextcloud-collabora
and then we need to try running our docker-compose script to "pull" in the pre-built Docker containers we've specified in our docker-compose.yml file:
docker-compose pull
All going well, after a few minutes (longer or shorter depending on the speed of your server's connection) you should have download the Nginx, Redis, NextCloud and Collabora-CODE Docker images. Then you can run:
docker-compose up -d && docker-compose logs -f
This will attempt to start up the containers (bringing them "up" in daemon mode, thus the -d) and then show you a stream of log messages from the containers, preceded by the container name. This should help you debug any problems that occur during the process (ideally, none).
Once you see log messages streaming past, and no obvious "container exited" or other error messages (which will usually contain the word "error" a lot), you should be able to point your browser at your selected domain name and bring it up in your browser!
Setting up the database
On doing so, if all is well, you should be directed through the database set up process for your NextCloud instance. Your details should be:
database IP: 172.17.0.1 - this is the default IP of the Docker host server.
database name: nextcloud
database user: nextcloud
database password: (the one you came up with above)
Setting the Admin user
Once that's set and working, NextCloud will install all the relevant database tables and initial data. You'll be asked to set up an admin user account, which can be "admin" (you could make it something different to help stymie nefarious probes that assume you've got a user called "admin" - but don't forget what you've called it!) and some strong password you create (you can use the pwgen utility you used earlier) - I'd recommend recording it somewhere. I would not recommend making your own account, in your name, the main admin account. I recommend creating a second account, with administrator privileges for yourself, but leave the admin account purely for administrative activities.
Configuring Outgoing Email
To allow your NextCloud instance to send outgoing email, so that your site can alert you to security updates that need to be applied, or so that users can request a replacement password if they've forgot theirs, you'll need an authenticating SMTP account somewhere. Most of you already have one. You'll probably want to set up a dedicated email address for this server somewhere, perhaps something like "nextcloud@your.domain" or similar, with a username (often just the email address) and a password. You'll need the following details:
SMTP server : an IP address or a domain name
SMTP username: a username or an email address
SMTP password: a strong password already configured for the username on that server
SMTP login security: whether login is via TLS, SSL, or unsecure (!!), and
SMTP login method: plain, encrypted, "login" or some other value.
You should be able to test your email settings to make sure the details you've entered are valid. If you need to adjust these settings later, you can go to the admin menu (top right of the web browser interface) and go to Admin->Additional Settings - should have a path of https://your.domain/settings/admin/additional
Configuring Collabora Office Integration
Once you're logged in as your own user, looking at your own default folders, you can start having a look around. You should have an "admin" menu (assuming you've created your user with Administrator privileges) at the top right of the web interface. If you go to Apps, you can use the search box to search for "Collabora" or go to the "Office & text" App category. You'll need to "enable" the Collabora Online "official" app, at which point it will download the latest version of the connector app and install it (it should appear in your /home/data/nextcloud/apps directory)
Once you've done that, go to your top right menu again, selecting Admin, and you should see "Collabora Online" as an option in the left column (which starts with "Basic settings"). Selecting that, you'll need to enter "https://collab.domain" (replacing with your domain, of course). I don't have any of the other options ticked.
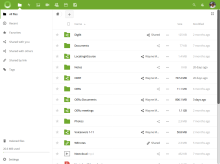
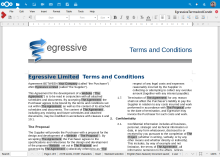
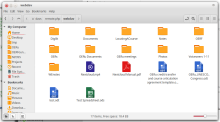
If it works, you should have the ability to go back to the home of your NextCloud install, which should show you your top-level folders. If you click the "+" next to the home icon (top left of the folder pane) you should now have the option to create (in addition to "Upload file", "New folder", "New text file") a "New Document", "New Spreadsheet", and "New Presentation". Clicking those should give you the Collabora Office interface for the designated content type.
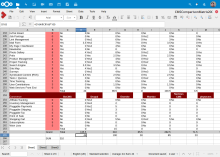
Similarly, you can use the "Upload file" to upload a document in a format that is supported by Collabora Office, once uploaded clicking on the filename should open it for editing in the appropriate Collabora Office interface.
It is saved as it is change, you shouldn't need to save it explicitly.
Upgrading it
So, as you're no doubt aware, both NextCloud and Collabora Office are always being improved and updated. I certainly encourage you to keep your installation up-to-date.
While you'll periodically see that NextCloud apps have available updates (these can be upgraded through the browser interface) updates to the NextCloud and Collabora Office systems themselves need to be undertaken by upgrading the containers. Luckily it's easy to do (although I strongly urge you to ensure you have a very recent backup of both database and uploaded files - they're the files in /home/data/nextcloud/data:
Updating the container should be as easy as either doing another
docker pull oeru/mautic
and then shutting down Docker container via a
docker-compose stop
removing the old containers (this won't remove any data you want to save if you followed the directions above! But remember to do it in the right directory!) via
docker-compose rm -v
and then restarting it via
docker-compose up -d
Use docker-compose logs -f to watch the logs - you'll likely see debugging information in the unlikely event that something goes wrong in the upgrade process.
Backing it up
To back up your instance on your server, you need two things: a file system backup of your /home/data/nextcloud directory, and database dumps of your database.
There're lots of ways to back up your files (I personally use a bash script that I wrote in a past role, which uses rdiff-backup to create versioned backups either locally or on a remote server, although there're other documented approaches - leave a comment below if you'd like to learn more about my approach!).
Backing up your database is as easy installing automysqlbackups:
sudo apt install automysqlbackups
You'll find daily versioned dumps of your MariaDB database(s) in /var/lib/automysqlbackups. To run an ad hoc backup (which will replace the previous backup from that day, if there is one) just run
sudo automysqlbackups
Collabora Admin Console
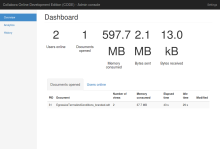
Once you've got everything set up, you can access the admin console of the Collabora Office instance at the collab.domain you specified above - it'll have the path https://collab.domain/loleaflet/dist/admin/admin.html (of course replacing collab.domain with your domain) which gives you useful info about the system resources being used, number of documents being edited and by whom, and some other interesting details. I've included a screen shot.
When prompted for login details, use the collab username - "admin" if you used the default I provided, and the password you set in your docker-compose.yml file above.
Blog comments
All I get after all of that…
All I get after all of that is "OK"
Sorry Tim, after all what?
Sorry Tim, after all what? I'd love to provide assistance, but need you to be a bit more specific.

Add new comment